Containerizing Application with Docker and Docker Concepts, Multistage Docker Volumes

Hello Team,
Working Devops Support Engineer having 8.2 years of experience in Unix, Shell Scripting, SQL. Since one year i started my journey as a DevOps support engineer where i am involved in Deployments, Infrastructure monitoring using AWS- cloud-watch, Automating simple task using shell scripts.
Monolithic Application vs Micro service:- In Monolithic application has a single code base where we have merged all the modules and created a single jar file. I can't specifically allocate more resources to a single specific module i have to scale the entire application stack. In Micro services we have breakdown the application into smaller independent and independent module and i can specifically allocate more resources to a specific module as per the requirement.
These micro services will interact each other through API calls. Suppose Module1 need some details of Module2 and Module2 need some details of module3 then they will call the end points.
In Monolithic architecture all the modules need to be developed in the same technological stack. Here in micro services we can developed module1 with Java and Module 2 with python and both the modules can be called using endpoints.
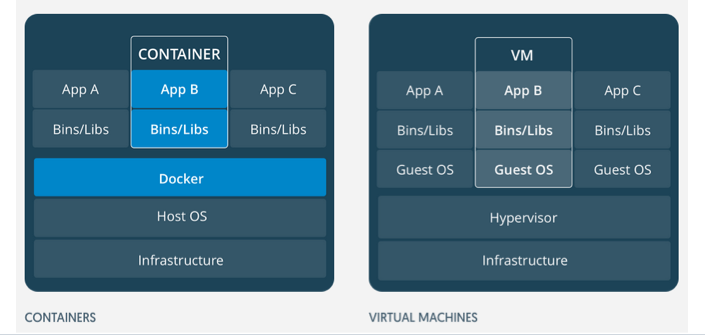
Virtualization vs Containerization:-
In Virtualization we have installed a software called Hypervisor. Hypervisor is a virtualization software which help us to create multiple VMs and on top of the VMs we will install our Operating System.
In containerization we have a single VM and on top of that we have installed the container engine named Docker. Here we have already virtualized the host OS and the same O/S can be used by different container like C1, C2 & C3. Docker is one of the container engine where we have deployed micro services on the containers.
The main concept of containerization i will be able to install more and more applications on a limited resources hence cost optimization has been achieved.
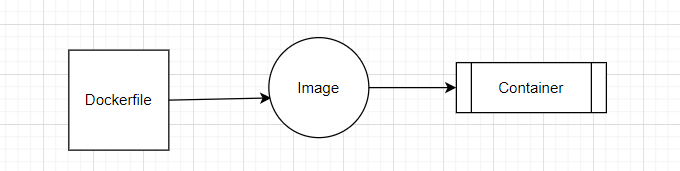
Docker is a container engine which packages my application and all the dependency in the form of a container and creates an image. When the image is running we say as container.
Docker Architecture:-
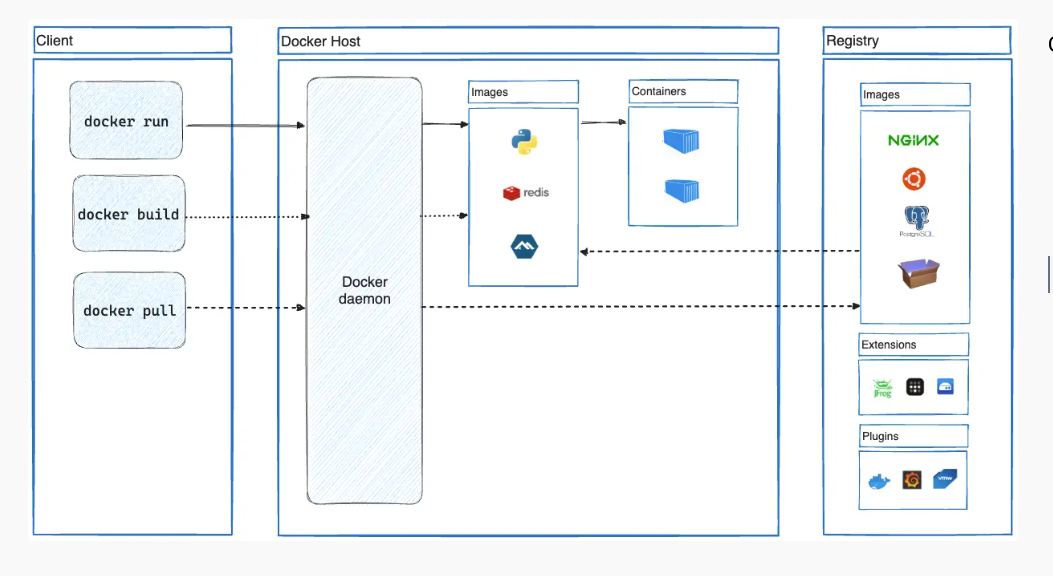
The docker users communicate with docker daemon through a docker client. The client uses REST API calls to communicate with docker daemon.
The docker client:-- It is a primary interface to docker. It accepts commands from user and communicate back and forth with docker daemon. When we use commands like docker run the client sends these commands to dockerd,which carries them out. The Docker commands uses Docker API. The Docker client can communicate with more than one daemon.
Docker daemon:- The docker daemon(dockerd) listens for docker API requests and manages Docker objects such as images, containers, networks, and volumes. A daemon can also communicate with other daemons to manage Docker services.
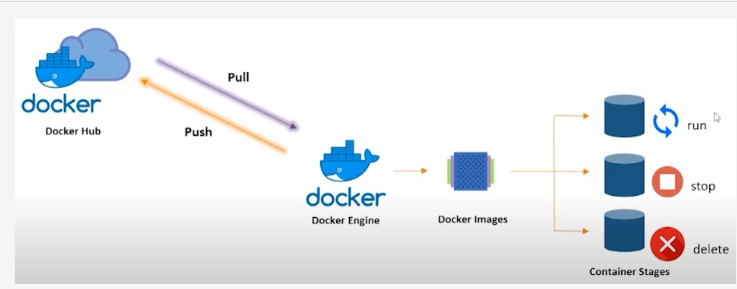
Docker registries:-
The Docker registry stores Docker images. Docker Hub is a public registry that anyone can use, and Docker looks for images on Docker Hub by default. You can even run your own private registry.
When you use the docker pull or docker run commands, Docker pulls the required images from your configured registry. When you use the docker push command, Docker pushes your image to your configured registry.
Public registry ---> Docker hub ;;; Private registry---> Here its used to share images with in the enterprises.
Images:--
An image is a read-only template with instructions for creating a Docker container. You might create your own images or you might only use those created by others and published in a registry. To build your own image, you create a Docker file with a simple syntax for defining the steps needed to create the image and run it. Each instruction in a Docker file creates a layer in the image. When you change the Docker file and rebuild the image, only those layers which have changed are rebuilt. This is part of what makes images so lightweight, small, and fast, when compared to other virtualization technologies
Containers:-
A container is a runnable instance of an image. You can create, start, stop, move, or delete a container using the Docker API or CLI. You can connect a container to one or more networks, attach storage to it, or even create a new image based on its current state. A container is defined by its image as well as any configuration options you provide to it when you create or start it. When a container is removed, any changes to its state that aren't stored in persistent storage disappear.
Dockerfile:-
Docker builds images automatically by reading the instructions from a Dockefile. The Dockerfile is a text document which contains all the commands a user could call on the command line to assemble an image.
When we install docker in my system :--
sudo apt-get install docker.io -y
The above command will install it will install docker engine, docker CLI, dockerd etc.
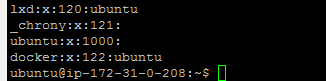
Once installed docker i will add docker to the current user with the below command.
sudo usermod -a -G docker $USER
Suppose i want to pull an image webserver(httpd). Then below is the command
sudo -i
root@ip-172-31-23-236:~# docker pull httpd
\Using default tag: latest
\latest: Pulling from library/httpd
a378f10b3218: Pull complete
c20157372e94: Pull complete
073cbcfef663: Pull complete
c36006acf55e: Pull complete
e94c45cb708a: Pull complete
Digest: sha256:5201524443f9026753e25540a44495b7f6e6ca706c71208bb3a5f2daac205c31
Status: Downloaded newer image for httpd:latest
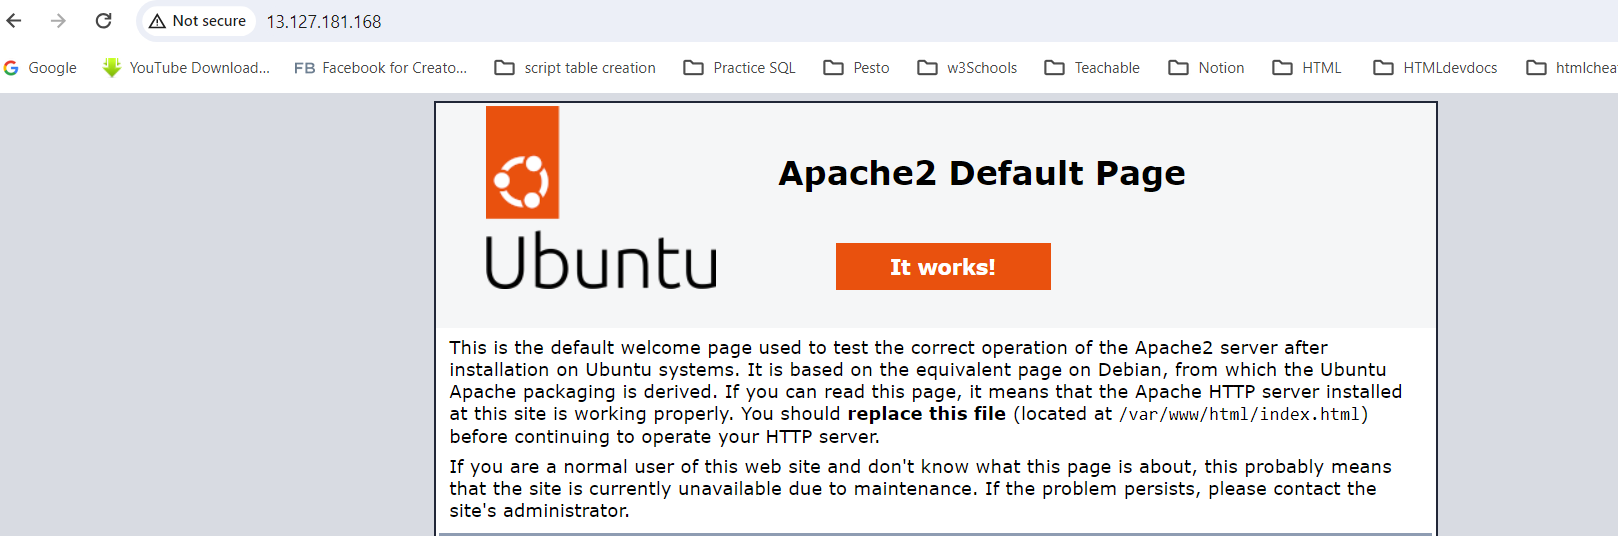
to install apache webserver. Cmd :- apt install apache2 -y
root@ip-172-31-28-127:~# apt install apache2 -y
Reading package lists... Done
Building dependency tree... Done
Reading state information... Done
The following additional packages will be installed:
  apache2-bin apache2-data apache2-utils bzip2 libapr1 libaprutil1 libaprutil1-dbd-sqlite3 libaprutil1-ldap liblua5.3-0 mailcap mime-support ssl-cert
Suggested packages:
  apache2-doc apache2-suexec-pristine | apache2-suexec-custom www-browser bzip2-doc
The following NEW packages will be installed:
apache2 apache2-bin apache2-data apache2-utils bzip2 libapr1 libaprutil1 libaprutil1-dbd-sqlite3 libaprutil1-ldap liblua5.3-0 mailcap mime-support ssl-cert
to check which port the webserver is installed. and to check the status of the webserver. systemctl is the command
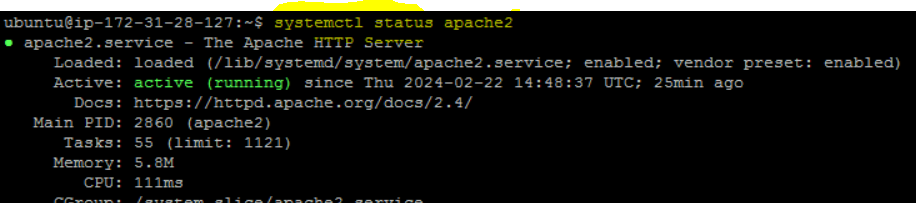
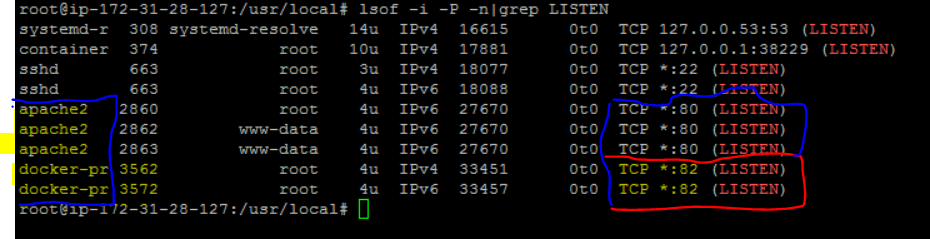
I can see in port number 80 the Apache Webserver is installed. cmd is:- lsof -i -P -n|grep "LISTEN"

inorder to access the webserver. I will edit inbound rules-->Add rule--> Then i will add the below entry. Because the webserver runs on port number 80.

Now as we have installed webserver. i can see the dummy page.
But my requirement is to run as a container. Once the container has been created in order to access it i suppose to created an bridge between Container and VM. As the only way i can access the webserver is through public I.P of the VM. To achieve this i have to perform port mapping.
Suppose if i want to know under which port the webserver is running. I can inspect on the image. cmd:- docker inspect httpd

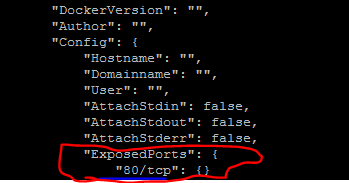
Under ExposedPorts: i can see under port 80 httpd will be running.
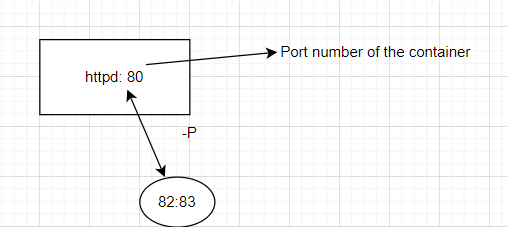
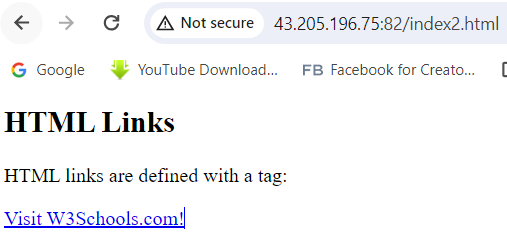
I am binding the port number of the host with the port number of the container. Here port number of the container is 80 and port number of the host is 82. So under host security group i have exposed the 82 port.

The command for running image as a container is mentioned below
docker run -itd -p 82:80 httpd (80: Port no of the container,82 Port number of the host). docker ps --> show the list of running container

----/ i -->interactive; t--> tty terminal; d--> detached mode /---
ref: https://docs.docker.com/reference/cli/docker/container/run/#detach
Now to get inside the container below is the command :--
root@ip-172-31-28-127:/usr/local# docker exec -it 04088226daa7 /bin/bash
root@04088226daa7:/usr/local/apache2#
root@04088226daa7:/usr/local/apache2# ls -l
total 40
drwxr-xr-x 2 root root 4096 Feb 13 01:55 bin
drwxr-xr-x 2 root root 4096 Feb 13 01:55 build
drwxr-xr-x 2 root root 4096 Feb 13 01:55 cgi-bin
drwxr-xr-x 4 root root 4096 Feb 13 01:55 conf
drwxr-xr-x 3 root root 4096 Feb 13 01:55 error
drwxr-xr-x 2 root root 4096 Feb 13 01:55 htdocs
drwxr-xr-x 3 root root 4096 Feb 13 01:55 icons
drwxr-xr-x 2 root root 4096 Feb 13 01:55 include
drwxr-xr-x 1 root root 4096 Feb 22 15:48 logs
drwxr-xr-x 2 root root 4096 Feb 13 01:55 modules
root@04088226daa7:/usr/local/apache2# cd htdocs
root@04088226daa7:/usr/local/apache2/htdocs# ls -l
total 4
-rw-r--r-- 1 504 staff 45 Jun 11 2007 index.html
root@04088226daa7:/usr/local/apache2/htdocs# cat index.html
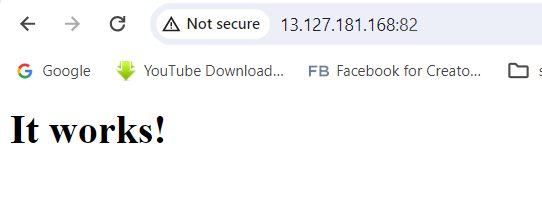
<html><body><h1>It works!</h1></body></html>
Suppose i want do some modification update the package and then install vim cmd:-- (apt install vim -y)
So i am hitting the port 82 in order to access the details of the container.
Now if i will check the occupied ports and in which port the container and web server is running. Below is the command.

Here i can see the size of the O/S is 167 MB. But will the whole webserver will fall in 167 MB size not possible as i did virtualize the whole O/S the size is showing 167 M.B. Let's save the image.
@ip-172-31-28-127:~$ docker commit 04088226daa7 httpd_updated_image
sha256:9190dd51b9360be59161dea7329d2f9429a06c01034ca17105097df1e3289515
ubuntu@ip-172-31-28-127:~$ docker images
REPOSITORY            TAG       IMAGE ID       CREATED         SIZE
httpd_updated_image   latest    9190dd51b936   7 seconds ago   229MB
httpd                 latest    2776f4da9d55   5 weeks ago     167MB
ubuntu@ip-172-31-28-127:~$
Here i can see the difference in space where the updated image is taking 229 M.B because the modification we have done(updating package, installing software vim) now reflecting in the new size.
Suppose i want to rename an container.
ubuntu@ip-172-31-28-127:~$ docker ps -a
CONTAINER ID IMAGE COMMAND CREATED STATUS PORTS NAMES
4d5b82d341ab fedora "/bin/bash" 13 minutes ago Up 13 minutes nervous_agnesi
04088226daa7 httpd "httpd-foreground" 19 hours ago Exited (0) 17 hours ago jovial_joliot
ubuntu@ip-172-31-28-127:~$ docker rename 4d5b82d341ab my_fedora
ubuntu@ip-172-31-28-127:~$ docker ps -a
CONTAINER ID IMAGE COMMAND CREATED STATUS PORTS NAMES
4d5b82d341ab fedora "/bin/bash" 14 minutes ago Up 14 minutes my_fedora
04088226daa7 httpd "httpd-foreground" 19 hours ago Exited (0) 17 hours ago jovial_joliot
root@ip-172-31-28-127:~# docker exec -it 4d5b82d341ab /bin/bash
~# docker stats
CONTAINER ID NAME CPU % MEM USAGE / LIMIT MEM % NET I/O BLOCK I/O PIDS
4d5b82d341ab my_fedora 0.00% 4.727MiB / 949.7MiB 0.50% 1.6kB / 0B 4.21MB / 4.1kB 1
//docker stats is command to check the CPU Utilization and memory utilization of the container
root@ip-172-31-28-127:~# docker commit 4d5b82d341ab image_name //--save the changes made to the container //
Suppose if we want to put constraint on the swap memory and total memory with the options given in the below commands:--
$ docker run -it -m 300M --memory-swap 1G ubuntu:22.04 /bin/bash
==To see the logs and container related information. Below is the command==
root@ip-172-31-28-127:~# docker container ls
CONTAINER ID IMAGE COMMAND CREATED STATUS PORTS NAMES
44e2742c9f15 httpd_updated_image "httpd-foreground" 15 minutes ago Up 15 minutes 0.0.0.0:82->80/tcp, :::82->80/tcp modest_shamir
root@ip-172-31-28-127:~#
root@ip-172-31-28-127:~# docker logs 44e2742c9f15
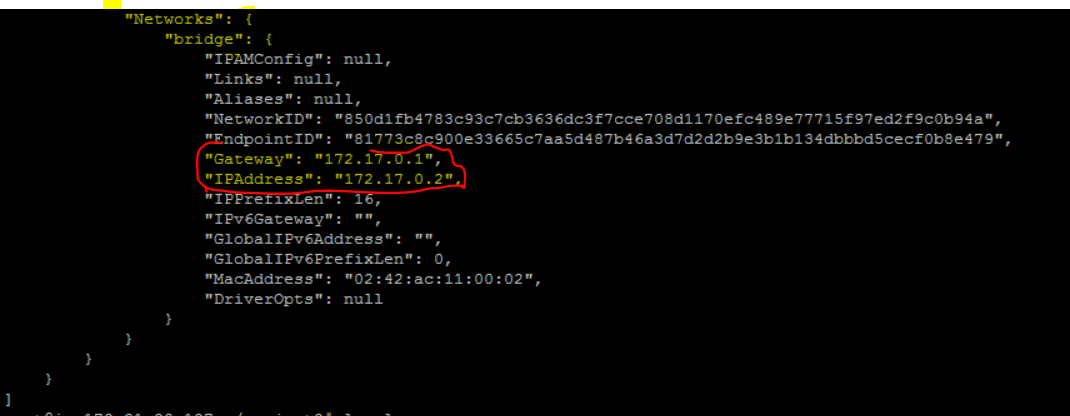
AH00558: httpd: Could not reliably determine the server's fully qualified domain name, using 172.17.0.2. Set the 'ServerName' directive globally to suppress this message
AH00558: httpd: Could not reliably determine the server's fully qualified domain name, using 172.17.0.2. Set the 'ServerName' directive globally to suppress this message
[Sat Feb 24 13:57:20.019691 2024] [mpm_event:notice] [pid 1:tid 140584836859776] AH00489: Apache/2.4.58 (Unix) configured -- resuming normal operations
[Sat Feb 24 13:57:20.026868 2024] [core:notice] [pid 1:tid 140584836859776] AH00094: Command line: 'httpd -D FOREGROUND'
49.37.117.122 - - [24/Feb/2024:14:04:05 +0000] "\x16\x03\x01\x02\x1a\x01" 400 226
49.37.117.122 - - [24/Feb/2024:14:04:06 +0000] "\x16\x03\x01\x02\x1a\x01" 400 226
49.37.117.122 - - [24/Feb/2024:14:04:06 +0000] "GET / HTTP/1.1" 200 78
49.37.117.122 - - [24/Feb/2024:14:04:06 +0000] "GET /favicon.ico HTTP/1.1" 404 196
49.37.117.122 - - [24/Feb/2024:14:04:57 +0000] "-" 408 -
We set both memory and swap memory, so the processes in the container can use 300M memory and 700M swap memory.
But in real time we club all the commands into a single file called as Docker file and then save and execute it.
DOCKER VOLUME:--
Docker volume used to persist the data across the lifecycle of a container. The docker volume will be created at the host level(disk level). Advantage:-- Once the Volume is created I can map the volume to the container I mean if the existing container dies that volume can be mapped to a new container .
root@ip-172-31-28-127:~# docker volume ls
DRIVER    VOLUME NAME
root@ip-172-31-28-127:~# docker volume create newdocker-volume
newdocker-volume
root@ip-172-31-28-127:~# docker volume ls
DRIVER    VOLUME NAME
local     newdocker-volume
root@ip-172-31-28-127:~# docker ps
CONTAINER ID   IMAGE                 COMMAND              CREATED         STATUS         PORTS                               NAMES
8422c945de4f   httpd_updated_image   "httpd-foreground"   8 minutes ago   Up 8 minutes   0.0.0.0:82->80/tcp, :::82->80/tcp   elegant_babbage
root@ip-172-31-28-127:~# docker rm -f 8422
8422
root@ip-172-31-28-127:~# docker ps
CONTAINER ID   IMAGE     COMMAND   CREATED   STATUS    PORTS     NAMES
root@ip-172-31-28-127:~# docker volume ls
DRIVER    VOLUME NAME
local     newdocker-volume

~# docker run -itd --mount source=newdocker-volume,target=/usr/local/apache2/htdocs -p 82:80 httpd_updated_image
e8631d7f750c950d749fa5b8c86356d611cceaa1090ca7dc98179e363421ecbb

root@ip-172-31-28-127:~# find / -name newdocker-volume
/var/lib/docker/volumes/newdocker-volume
root@ip-172-31-28-127:~# cd /var/lib/docker/volumes/newdocker-volume
root@ip-172-31-28-127:/var/lib/docker/volumes/newdocker-volume# ls -l
total 4
drwxr-xr-x 2 root root 4096 Feb 24 15:16 _data
root@ip-172-31-28-127:/var/lib/docker/volumes/newdocker-volume# cd _data
root@ip-172-31-28-127:/var/lib/docker/volumes/newdocker-volume/_data# ls -l
total 4
-rw-r--r-- 1 504 staff 63 Feb 22 16:11 index.html
root@ip-172-31-28-127:/var/lib/docker/volumes/newdocker-volume/_data#
root@ip-172-31-28-127:/var/lib/docker/volumes/newdocker-volume/_data# cat index.html
<html><body><h1>Hello World! It works fine!</h1></body></html>
root@ip-172-31-28-127:~#
docker run -itd --mount source=newdocker-volume,target=/usr/local/apache2/htdocs -p 82:80 httpd_updated_image e8631d7f750c950d749fa5b8c86356d611cceaa1090ca7dc98179e363421ecbb
// Whatever data is present in the target path same data will be present in the source path.
//Here I am mounting my volume named: newdocker-volume to the target location: /usr/local/apache2/htdocs In the context of web container.//
root@e8631d7f750c:/usr/local/apache2/htdocs# ls -l
total 4
-rw-r--r-- 1 504 staff 63 Feb 22 16:11 index.html
root@e8631d7f750c:/usr/local/apache2/htdocs# vim index2.html
root@e8631d7f750c:/usr/local/apache2/htdocs# ls -l
total 8
-rw-r--r-- 1  504 staff 63 Feb 22 16:11 index.html
-rw-r--r-- 1 root root  40 Feb 24 15:47 index2.html
root@e8631d7f750c:/usr/local/apache2/htdocs# cat index2.html
<h1>we are learning docker volume </h1>
root@e8631d7f750c:/usr/local/apache2/htdocs# exit
exit
root@ip-172-31-28-127:/var/lib/docker/volumes/newdocker-volume/_data# ls -l
total 8
-rw-r--r-- 1  504 staff 63 Feb 22 16:11 index.html
-rw-r--r-- 1 root root  40 Feb 24 15:47 index2.html
root@ip-172-31-28-127:/var/lib/docker/volumes/newdocker-volume/_data# cat index2.html
<h1>we are learning docker volume </h1>
root@ip-172-31-28-127:/var/lib/docker/volumes/newdocker-volume/_data#
In the above snippet I have created a new file named index2.html under (location: /usr/local/apache2/htdocs). When I exited from the container I could see the same Index file is available in the path(/var/lib/docker/volumes/newdocker-volume/_data).
Now suppose i have deleted the container. Let's check whether the data being persistent or not. Means i will create a new container and mount the volume with the new container let's check whether the data is persistent or not.
root@ip-172-31-28-127:/var/lib/docker/volumes/newdocker-volume/_data# docker ps
CONTAINER ID   IMAGE                 COMMAND              CREATED          STATUS          PORTS                               NAMES
e8631d7f750c   httpd_updated_image   "httpd-foreground"   38 minutes ago   Up 38 minutes   0.0.0.0:82->80/tcp, :::82->80/tcp   amazing_snyder
root@ip-172-31-28-127:/var/lib/docker/volumes/newdocker-volume/_data#
docker rm -f e8631d7f750ce8631d7f750c

root@ip-172-31-28-127:/var/lib/docker/volumes# docker ps
CONTAINER ID   IMAGE     COMMAND   CREATED   STATUS    PORTS     NAMES

root@ip-172-31-28-127:/var/lib/docker/volumes
# docker run -itd --mount source=newdocker-volume,
target=/usr/local/apache2/htdocs -p 82:80 httpd

2f16d87a45a970dfa3bd2f214b16d21813a818f1007523b9a657a0604f366793
root@ip-172-31-28-127:/var/lib/docker/volumes#
root@ip-172-31-28-127:/var/lib/docker/volumes# docker ps
CONTAINER ID   IMAGE     COMMAND              CREATED          STATUS          PORTS                               NAMES
2f16d87a45a9   httpd     "httpd-foreground"   20 seconds ago   Up 19 seconds   0.0.0.0:82->80/tcp, :::82->80/tcp   nice_engelbart
root@ip-172-31-28-127:/var/lib/docker/volumes#
root@ip-172-31-28-127:/var/lib/docker/volumes#
docker exec -it 2f16d87a45a9 /bin/bash

root@2f16d87a45a9:/usr/local/apache2# ls
bin  build  cgi-bin  conf  error  htdocs  icons  include  logs  modules
root@2f16d87a45a9:/usr/local/apache2# cd htdocs
root@2f16d87a45a9:/usr/local/apache2/htdocs# ls
index.html  index2.html
root@2f16d87a45a9:/usr/local/apache2/htdocs# exit
exit
root@ip-172-31-28-127:/var/lib/docker/volumes# ls -l
total 28
brw------- 1 root root 202, 1 Feb 24 13:50 backingFsBlockDev
-rw------- 1 root root  32768 Feb 24 14:20 metadata.db
drwx-----x 3 root root   4096 Feb 24 14:20 newdocker-volume
root@ip-172-31-28-127:/var/lib/docker/volumes# cd newdocker-volume
root@ip-172-31-28-127:/var/lib/docker/volumes/newdocker-volume# ls
_data
root@ip-172-31-28-127:/var/lib/docker/volumes/newdocker-volume# cd _data
root@ip-172-31-28-127:/var/lib/docker/volumes/newdocker-volume/_data# ls
index.html  index2.html
root@ip-172-31-28-127:/var/lib/docker/volumes/newdocker-volume/_data#
Here in the above example i have created a new container(with the image:- httpd)
and now mounting with volume newdocker-volume
to the target /usr/local/apache2/htdocs.
I can see Same data available in /usr/local/apache2/htdocs path
and in /var/lib/docker/volumes/newdocker-volume/_data path respectively.
Let's Create Dockerfile and run some docker commands
To study general commands used to create docker file can be used with the below links 1.hyperlink. 2.linklink3.
Now we will create a docker file and from the docker file we will build an image and then as per requirement we can run the image as a container.
Here i have created 3 files i)index1.html ii)index2.html iii)Dockerfile
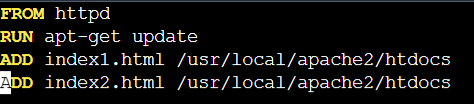
FROM --> It specifies the base image .
Each instruction in a Docker file creates a layer in the image
docker build . -t httpd1 ( . or the location of the docker file, -t -->tag, httpd1 --> name of new image)
The
ADDinstruction can copy and extract TAR files from the Docker host to the Docker image. Below is the outputStep 1/4 : FROM httpd ---> 2776f4da9d55 Step 2/4 : RUN apt-get update ---> Running in b658c90a3b73 Get:1 http://deb.debian.org/debian bookworm InRelease [151 kB] Get:2 http://deb.debian.org/debian bookworm-updates InRelease [55.4 kB] Get:3 http://deb.debian.org/debian-security bookworm-security InRelease [48.0 kB] Get:4 http://deb.debian.org/debian bookworm/main amd64 Packages [8786 kB] Get:5 http://deb.debian.org/debian bookworm-updates/main amd64 Packages [12.7 kB] Get:6 http://deb.debian.org/debian-security bookworm-security/main amd64 Packages [143 kB] Fetched 9196 kB in 2s (5920 kB/s) Reading package lists... Removing intermediate container b658c90a3b73 ---> 9230d4596a93 Step 3/4 : ADD index1.html /usr/local/apache2/htdocs ---> 50e8139b9f53 Step 4/4 : ADD index2.html /usr/local/apache2/htdocs ---> 77413cff423c Successfully built 77413cff423c Successfully tagged httpd1:latestThe above output suggests we have created the image and it has moved index1.html and index2.html into the image.
Then if i want to run the image as a container below is the command:--
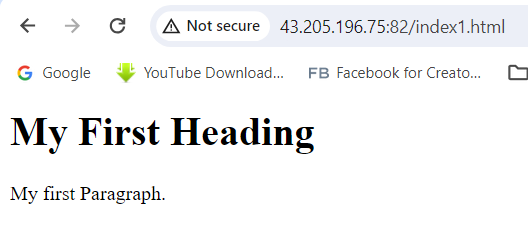
                                root@ip-172-31-28-127:~/project1# docker run -itd -p 82:80 httpd1
                                0ad5c11c8883f56daf8e94b350a99e5d586e3a434524648a59ea56857d1a76b9
                                root@ip-172-31-28-127:~/project1# docker container ls
                                CONTAINER ID   IMAGE     COMMAND              CREATED          STATUS          PORTS                               NAMES
                                0ad5c11c8883   httpd1    "httpd-foreground"   15 seconds ago   Up 14 seconds   0.0.0.0:82->80/tcp, :::82->80/tcp   goofy_kilby
If i want to access the index1.html page then below is the command.
publicip:portno/index1.html
What is the difference between ENTRYPOINT & CMD ?
RUN will execute any commands in a new layer on top of the current image and commit the results.
RUN ["executable", "param1", "param2"]
Entrypoint makes my docker images an executable command itself, which can be started and shutdown automatically.
ENTRYPOINT apachectl -D FOREGROUND // It runs my entry apache webserver in the foreground//
Suppose someone want to see the i.p address of the running container then
command is docker inspect containerid

Docker Compose:--
Docker Compose allows you to define and manage multi-container applications in a single YAML file. This simplifies the complex task of orchestrating and coordinating various services, making it easier to manage and replicate your application environment.
To learn how a sample YAML is written follow the link.
Below i have written a sample yaml file which has the front end layer(presentation layer), for data base layer we have installed mysql database.
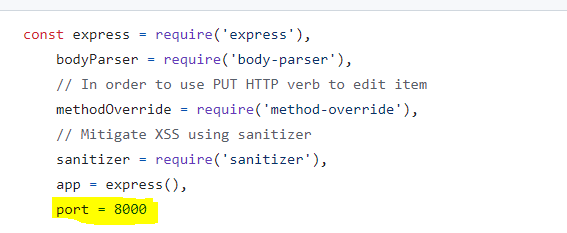
                            Services:
                              db:
                                image: mysql:8.0.27
                                command: '--default-authentication-plugin=mysql_native_password'
                                volumes:
                                  - db_data:/var/lib/mysql
                                restart: always
                                environment:
                                  - MYSQL_ROOT_PASSWORD=somewordpress
                                  - MYSQL_DATABASE=wordpress
                                  - MYSQL_USER=wordpress
                                  - MYSQL_PASSWORD=wordpress
                                expose:
                                  - 3306
                                  - 33060
                              wordpress:
                                depends_on:
                                  - db
                                image: wordpress:latest
                                volumes:
                                  - wp_data:/var/www/html
                                ports:
                                  - 8000:80
                                restart: always
                                environment:
                                  - WORDPRESS_DB_HOST=db
                                  - WORDPRESS_DB_USER=wordpress
                                  - WORDPRESS_DB_PASSWORD=wordpress
                                  - WORDPRESS_DB_NAME=wordpress
                            volumes:
                              db_data:
                              wp_data:
Note: Here depends on means first db container will run and once db container is created. Then wordpress container will be created.
ports 8000:80 (I am mapping the port 8000 with the public ip of the container which is the website). So technically i am doing port mapping for the website
                            volumes:
                                  - db_data:/var/lib/mysql  // Creating a volume db_data and then
                            i will mount the volume to  /var/lib/mysql because db files are there in
                            the folder
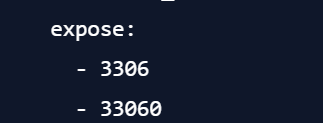
Here for the database connection i have exposed the ports 3306 & 33060. I am not performing any port mapping.
In the wordpress it has The YAML generally falls in KEY:Value pair combinedly called it's called as object. After indentation a list is generally followed by '-' . But for multiline string it's represented by '|' .
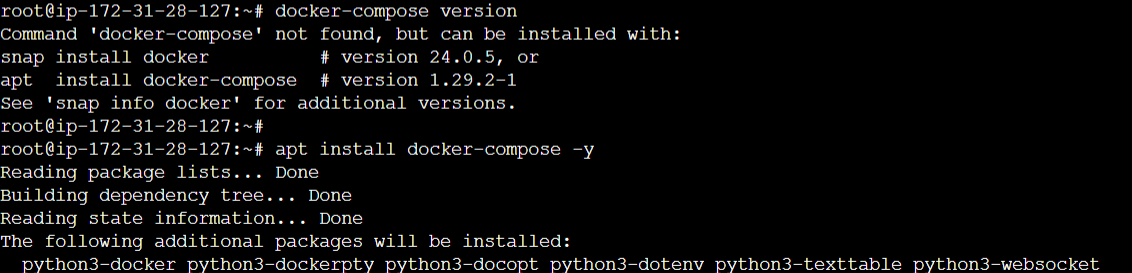
Now let's check docker compose version has been installed or not. We can install it using command:-
apt install docker-compose -y
Now i will create a new yaml file named "docker-compose.yml"
Now while performing the build we will receive couple of errors. One is bind:address already in use.

When i checked the listing ports i find the port 80 already is in use.

so i have changed the compose file slightly

The docker compose up command aggregates the output of each container (like docker compose logs --follow does). One can optionally select a subset of services to attach to using --attach flag, or exclude some services using --no-attach to prevent output to be flooded by some verbose services.
When the command exits, all containers are stopped. Running docker compose up --detach starts the containers in the background and leaves them running.
Now i have stopped each and every container and then restarted it. In the below example i could see two containers are running and two volumes has been created successfully.


Now as we have deployed and run the wordpress website and it's running Successfully.
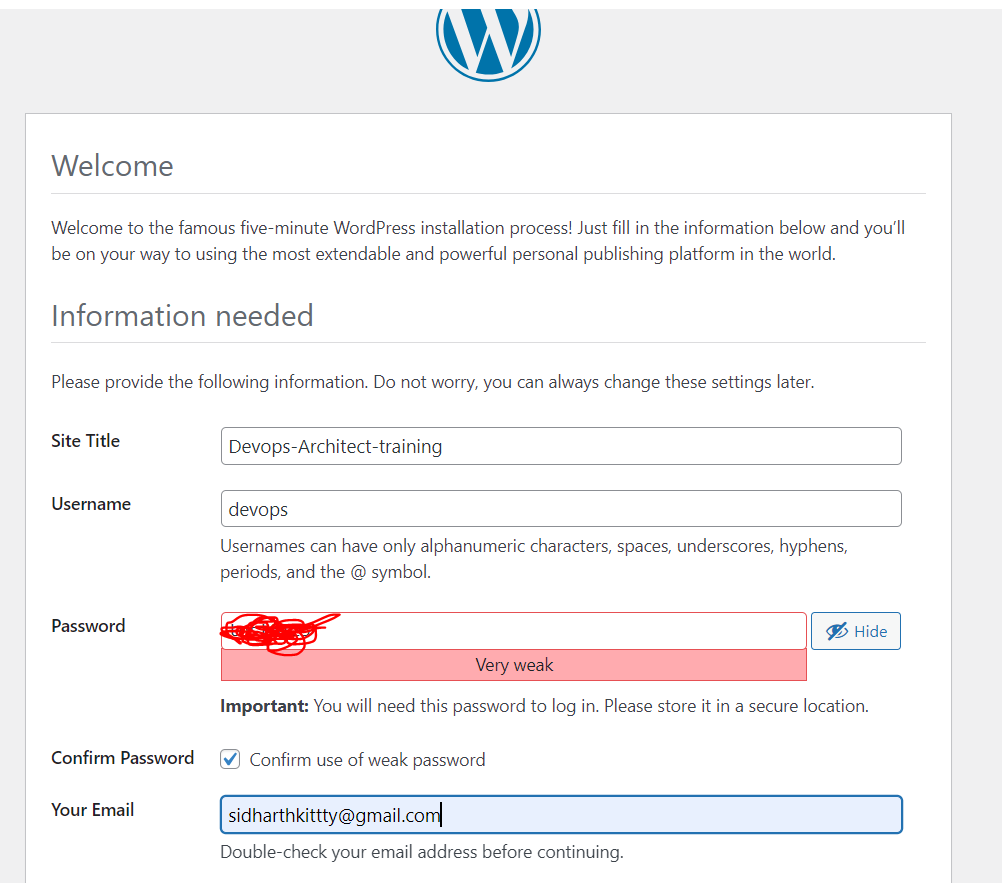
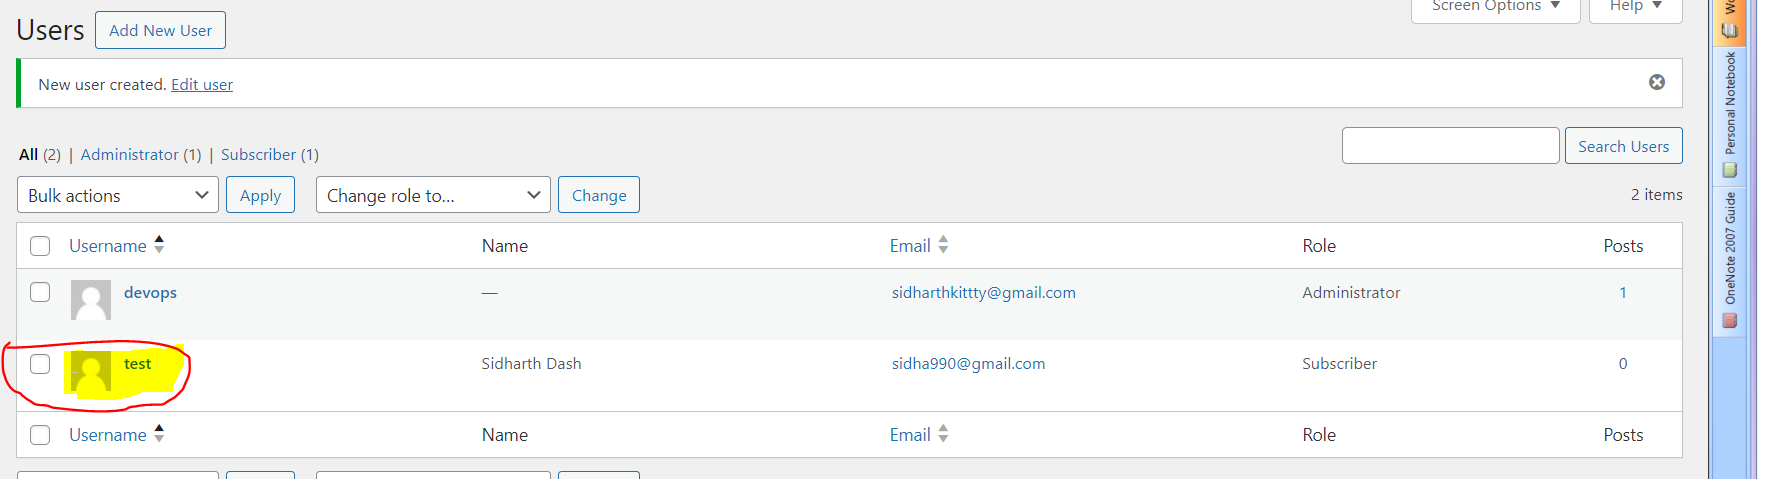
Now I have added a user to the website then it should be reflected in the database
Now as i have mounted the data to the volume - wp_data:/var/www/html . So even if the container dies my data will be safe.
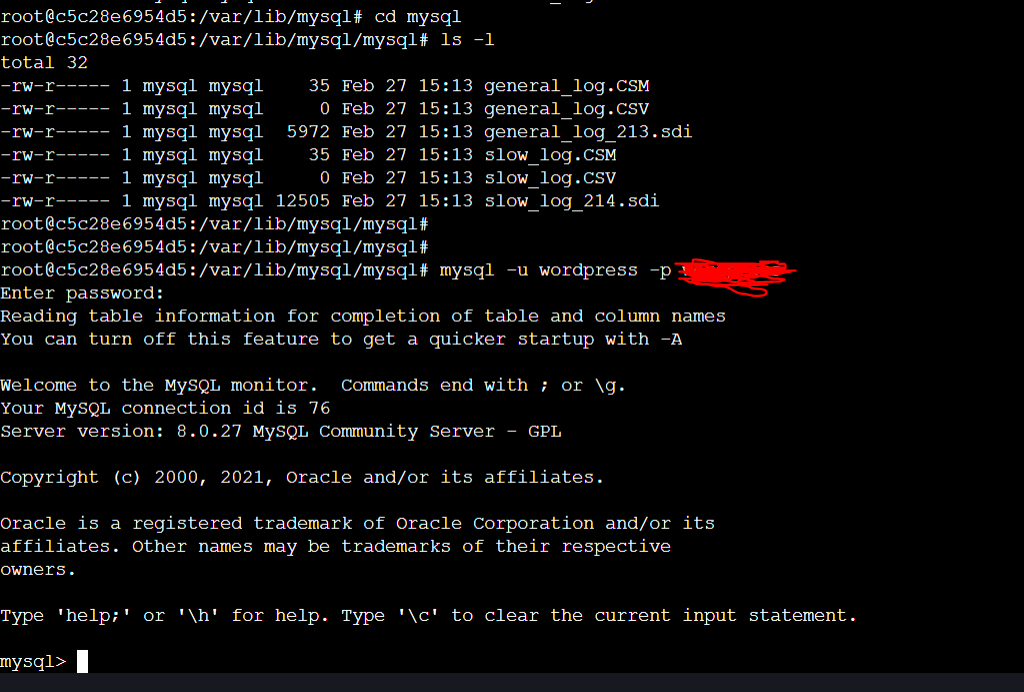
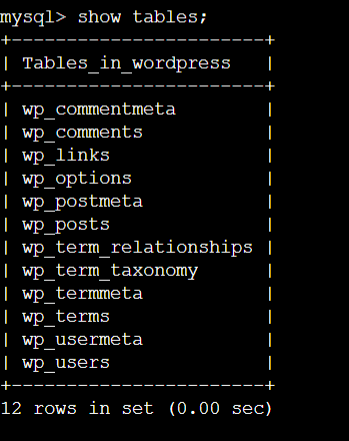
                            root@ip-172-31-28-127:~/project3# docker ps
                            CONTAINER ID   IMAGE              COMMAND                  CREATED       STATUS       PORTS                               NAMES
                            2d54dec252af   wordpress:latest   "docker-entrypoint.s…"   2 hours ago   Up 2 hours   0.0.0.0:82->80/tcp, :::82->80/tcp   project3_wordpress_1
                            c5c28e6954d5   mysql:8.0.27       "docker-entrypoint.s…"   2 hours ago   Up 2 hours   3306/tcp, 33060/tcp                 project3_db_1
                            root@ip-172-31-28-127:~/project3# docker exec -it c5c28e6954d5 /bin/bash
                            root@c5c28e6954d5:/var/lib/mysql# cd mysql
                            root@c5c28e6954d5:/var/lib/mysql/mysql# ls -l
                            total 32
                            -rw-r----- 1 mysql mysql    35 Feb 27 15:13 general_log.CSM
                            -rw-r----- 1 mysql mysql     0 Feb 27 15:13 general_log.CSV
                            -rw-r----- 1 mysql mysql  5972 Feb 27 15:13 general_log_213.sdi
                            -rw-r----- 1 mysql mysql    35 Feb 27 15:13 slow_log.CSM
                            -rw-r----- 1 mysql mysql     0 Feb 27 15:13 slow_log.CSV
                            -rw-r----- 1 mysql mysql 12505 Feb 27 15:13 slow_log_214.sdi
                            root@c5c28e6954d5:/var/lib/mysql/mysql#
Now once i logged in to database

Now as the image has been created i want to tag the image and then push the image
docker image tag wordpress:latest narayanhari/node-todo-cicd:wordpress_v1 (wordpress_v1 is the tag name)
docker push narayanhari/node-todo-app-cicd:tagname
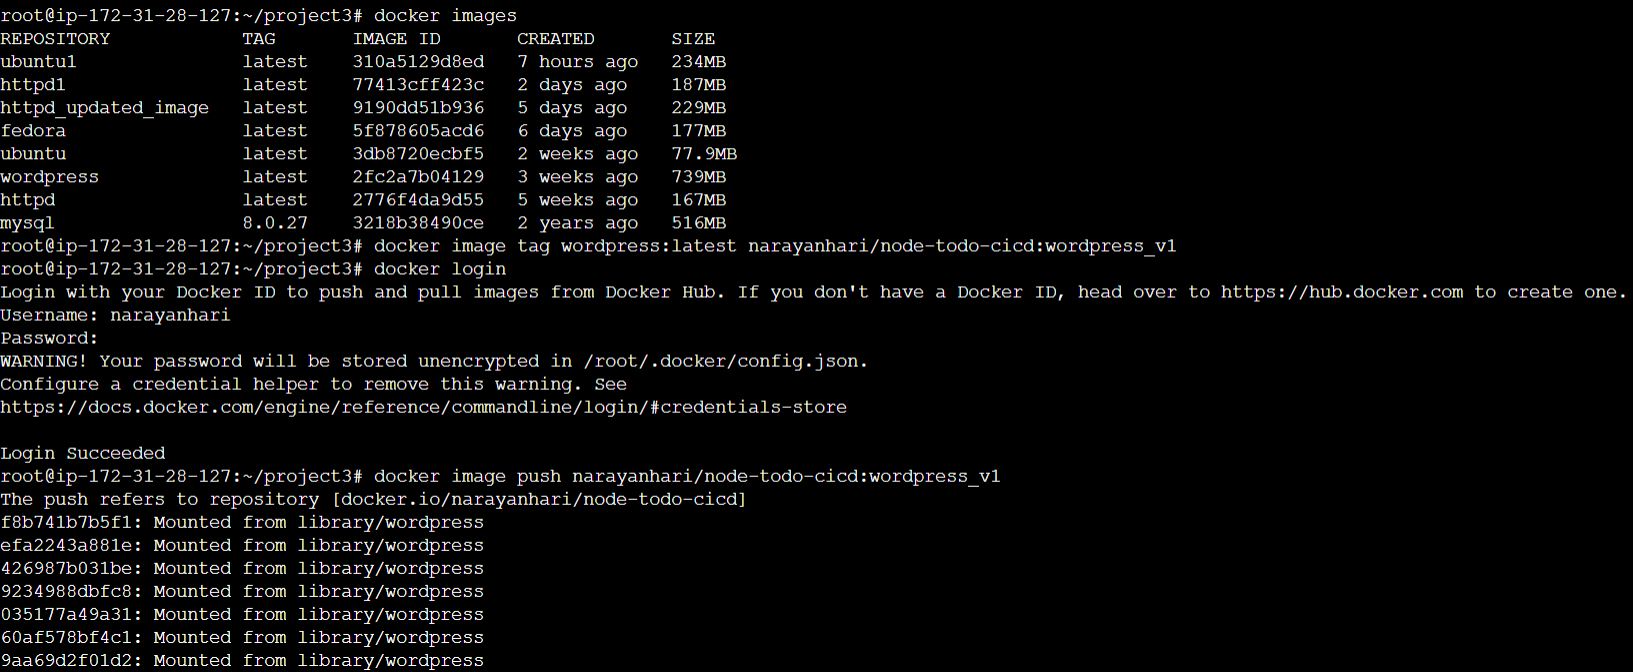
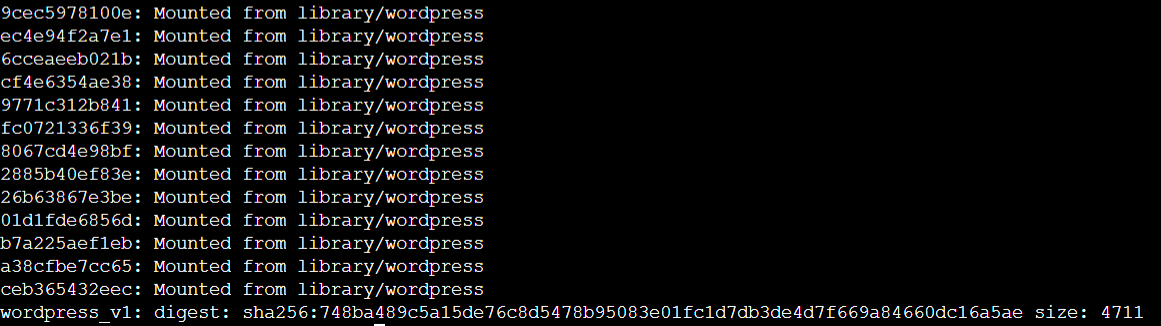
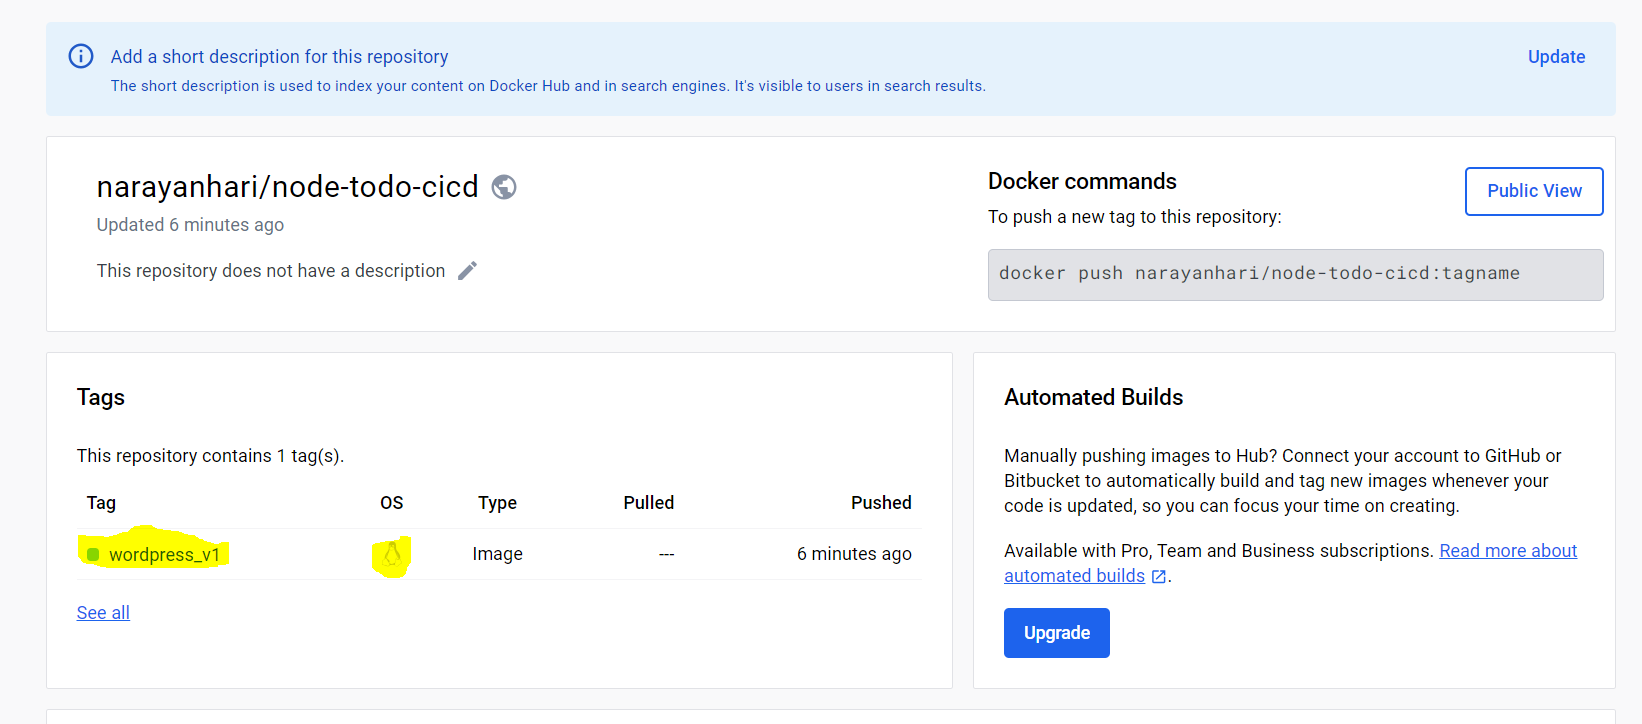
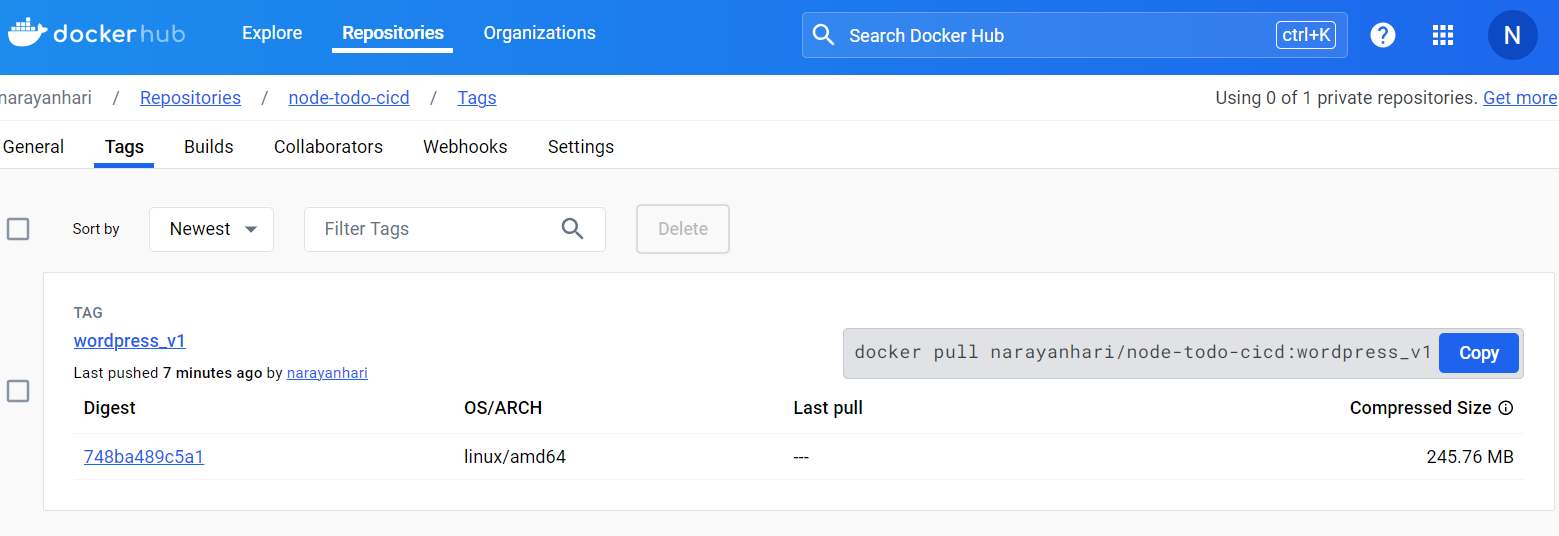
Now if i want see the changes. I can see that in below screen shot.
All the commands which has practiced can be accessed in the below Github Repo
https://github.com/Satyadevoperations/Practice
Let's Deploy a Django Application:--
Before creating the build for the python code. We suppose to know the application the skeleton. Means how the application front end, backend(where the programming related logic is written) and db layer interact with each other. Where the application's one service interact with other service as well. Where the application related libraries and utilities, configurations are available.
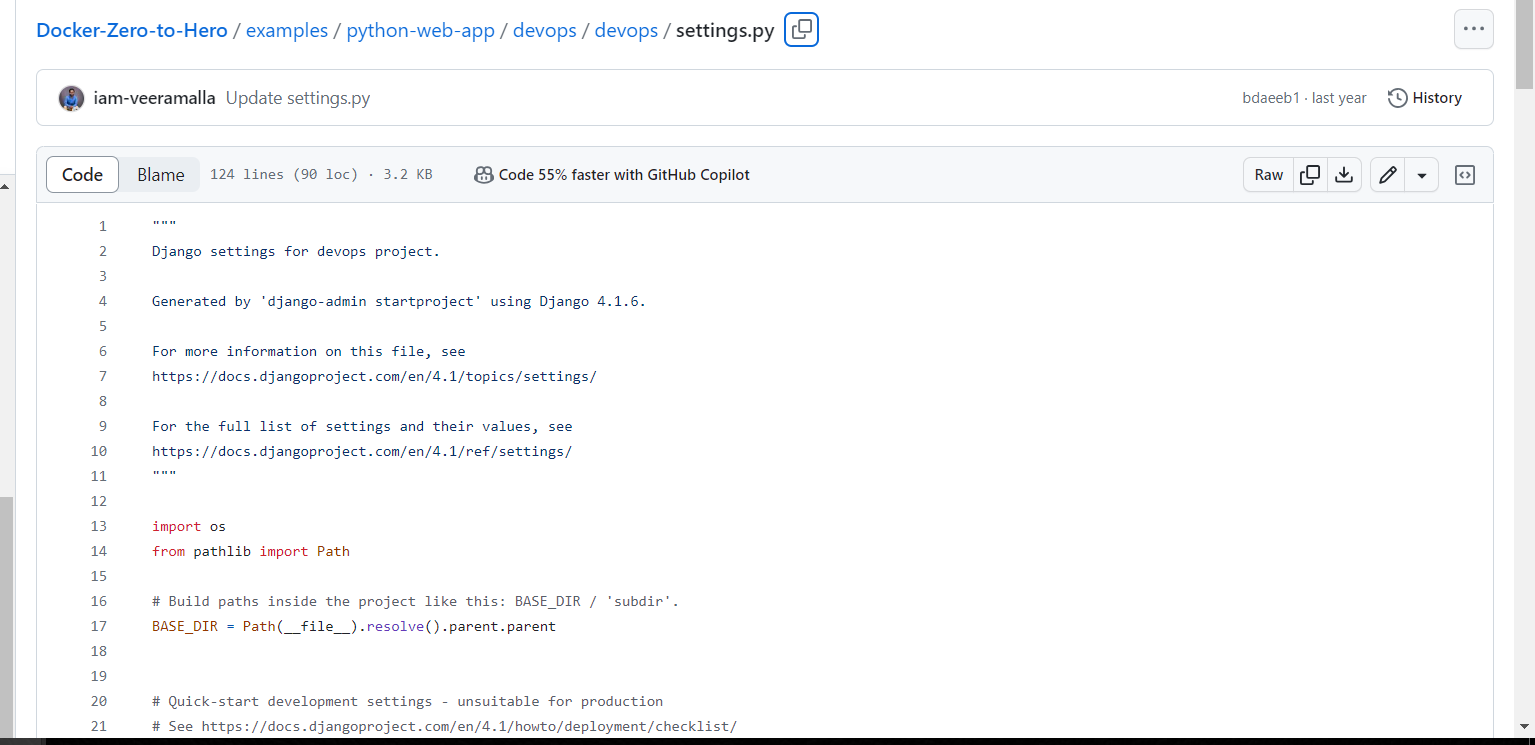
Suppose i want seen all the configurations of the entire project. I can see in the below path. It shows what are I.Ps need to be whitelisted, What are the database going to connect, django middle-ware, secret keys, webserver gateway interface all the details are written in the settings.py
examples/python-web-app/devops/devops/settings.py
Suppose i want to see where the code(backend code) is written.
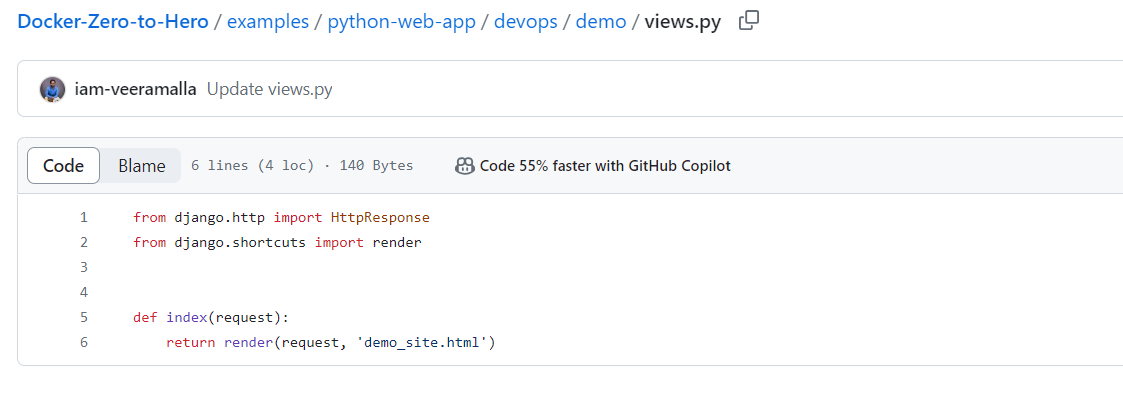
Here the above code i have written a html function named index it's simply rendering the html file(demo_site.html). This html file is present in the template folder. Here my content gets served.

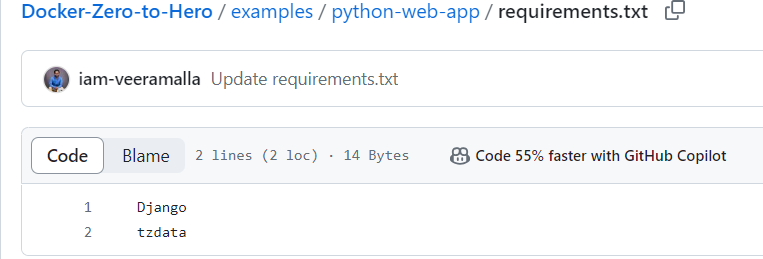
Let's check the requirements.txt file it has the contents to run my django application.
Now i have cloned the repository and i am ready to see the contents of the Dockerfile.
root@ip-172-31-28-127:~/project4/examples/python-web-app# ls
Dockerfile  devops  requirements.txt
root@ip-172-31-28-127:~/project4/examples/python-web-app# cat Dockerfile
FROM ubuntu
##I have taken a base image called ubuntu.
WORKDIR /app
##Location where i can save my source code. /app is My work dir##
COPY requirements.txt /app
##First thing to copy inside my workdirectory is requirements.txt file.
##It has dependencies required to run the python application
COPY devops /app

RUN apt-get update && \
    apt-get install -y python3 python3-pip && \
    pip install -r requirements.txt && \
##pip install cmd is used to install the requirements.txt
    cd devops

ENTRYPOINT ["python3"]
CMD ["manage.py", "runserver", "0.0.0.0:8000"]
Entrypoint will have non-overridable value. where as in CMD is configurable. Which means in CMD instead of runserver probably they want to integrate webserver gateway and they want to put more values CMD will allow that, suppose i dont want to change any of the fields here then i will pass all of the fields as a ENTRYPOINT.
Now i have cloned the repository

And then build the code.
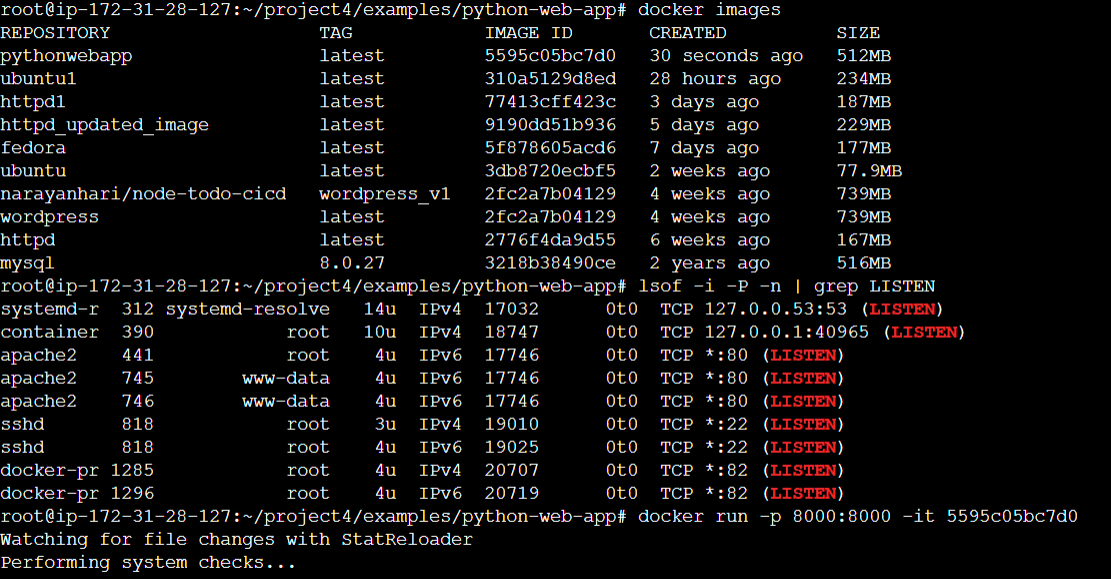
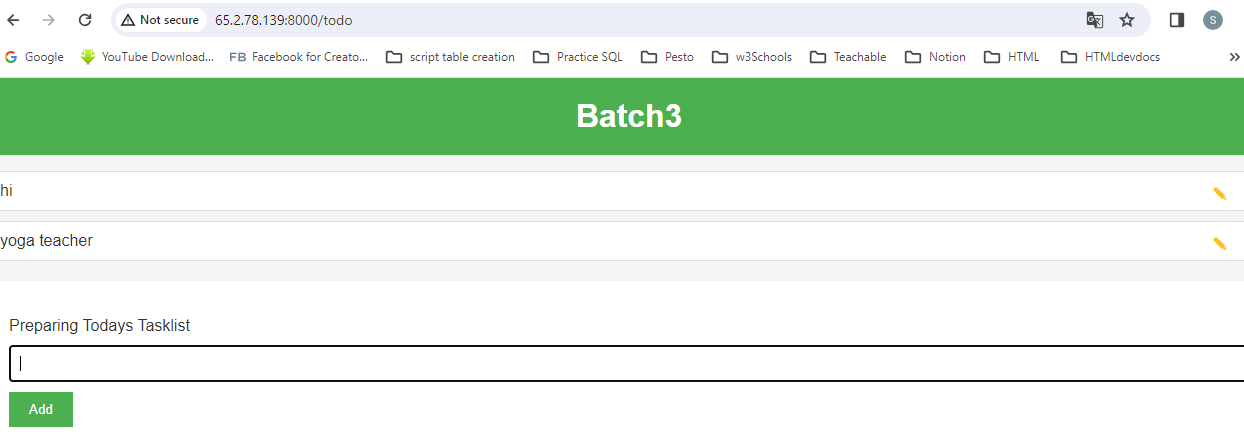
Now i could see the application has been deployed.

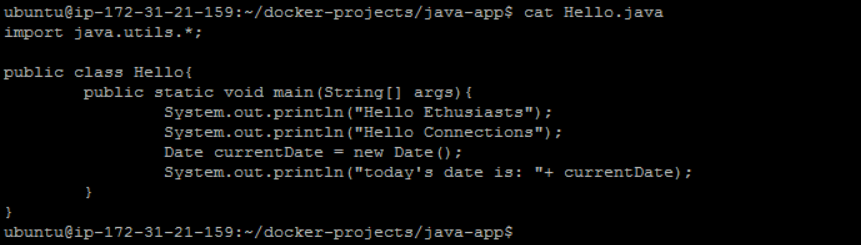
Lets Build and Deploy a sample Java Application:-
I have created an folder for java-app in my ec2 instance and under that an application code is there.
Inorder to build and deploy the java code we have some pre-requisite
Base Image
Command to compile the code(javac programname.java)
java code
jdk
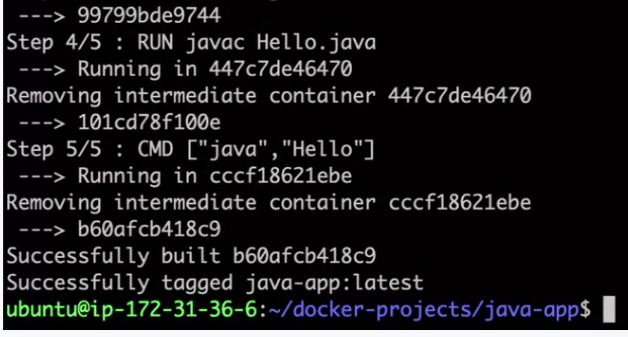
 #Get a Base image with Jdk installed
 FROM openjdk:11

 #Create a working directory to compile, run java apps
 WORKDIR /app

 #copy code from local machine to docker container
 #i have put '.' because my working directory is my curr dir
 COPY Hello.java .

 # Compile the code
 RUN javac Hello.java
 #Once java file gets compiled it generates a class

 CMD["java","Hello"]
 # Run the java app
 # class name is Hello
In the process of the container building steps suppose i need to give some commands then i will use RUN. But Once the container has been build and where need to provide some arguments then we can use CMD with arguments mentioned in [ ] . Note: Docker commands are case sensitive

docker build . -t java-app:latest . // As the Docker file is present in the same directory so i am usuing . //
Error in buildx plugin
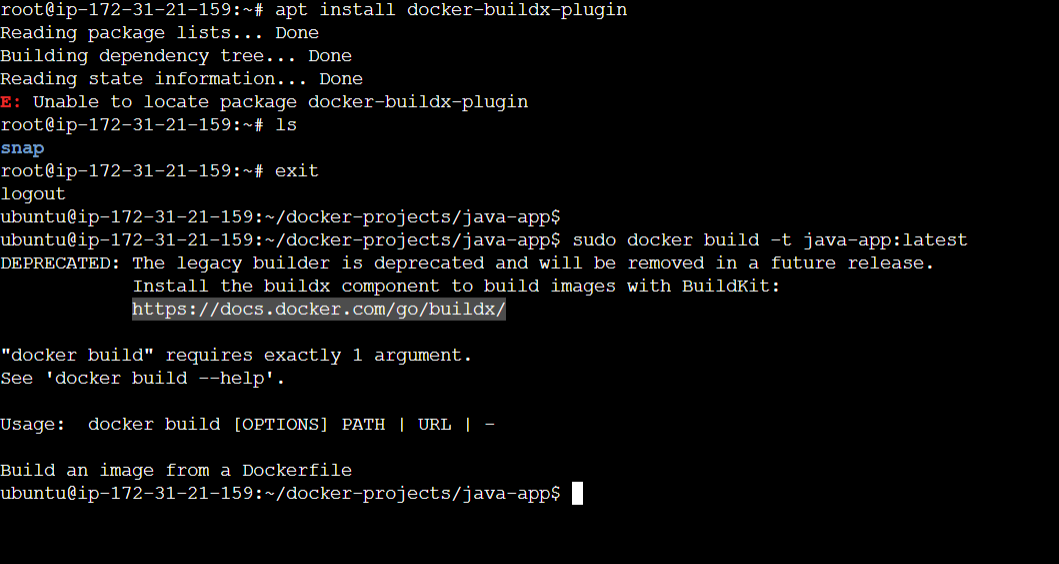
https://stackoverflow.com/questions/75452542/how-to-install-buildx-with-docker-23-0-1 //follow the link for solution...
Now when i tried performing the build it failed because the developer didn't properly mention the package name.
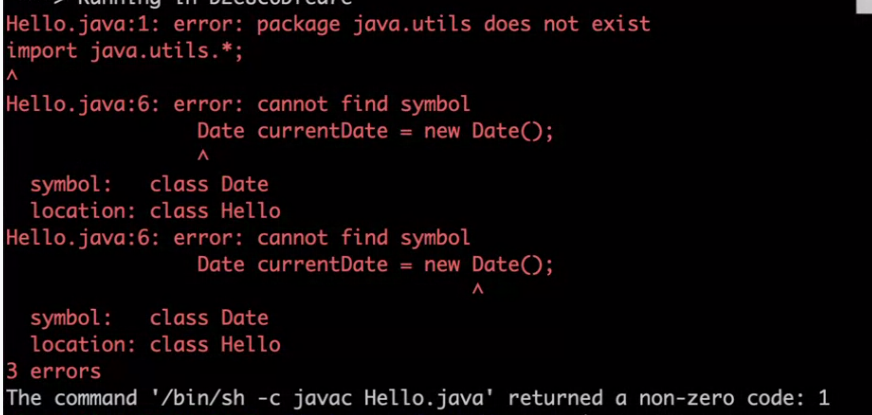
The developer corrected the code and mentioned as

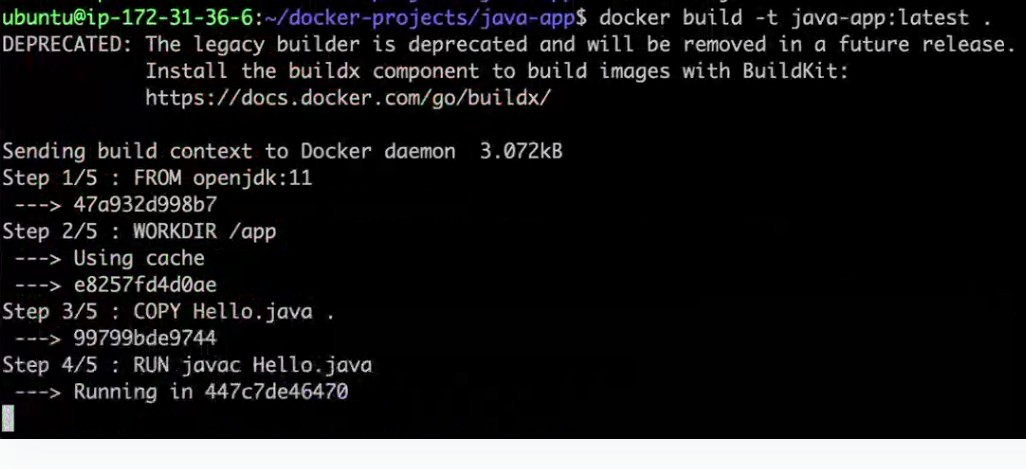
Now when i started building the image. It successfully build.

Let's Create a Docker file for Flask Application and Build and Deploy it
First i am cloning the Git repository to my local and now let's understand the components available for the application.
ubuntu@ip-172-31-0-208:~/docker-projects$ git clone https://github.com/LondheShubham153/flask-app-ecs.git
Cloning into 'flask-app-ecs'...
remote: Enumerating objects: 12, done.
remote: Counting objects: 100% (12/12), done.
remote: Compressing objects: 100% (10/10), done.
remote: Total 12 (delta 2), reused 5 (delta 0), pack-reused 0
Receiving objects: 100% (12/12), done.
Resolving deltas: 100% (2/2), done.
ubuntu@ip-172-31-0-208:~/docker-projects$
ubuntu@ip-172-31-0-208:~/docker-projects$ ls
flask-app-ecs  java-app
ubuntu@ip-172-31-0-208:~/docker-projects$
ubuntu@ip-172-31-0-208:~/docker-projects$ cd flask-app-ecs
ubuntu@ip-172-31-0-208:~/docker-projects/flask-app-ecs$ cd flask-app-ecs
-bash: cd: flask-app-ecs: No such file or directory
ubuntu@ip-172-31-0-208:~/docker-projects/flask-app-ecs$ ls
Dockerfile  README.md  app.py  requirements.txt  run.py
Here in the above folder we have many folders where we can see README.md(It contains instructions how to the run the app).
But the biggest challenge is in the README.md app there is no sufficient instructions mentioned how to run the app. In that situation we can consult the developer and figure out the stuff. Generally for java application it's pom.xml and for node.js it's package.json and for django or python related application details were written in requirements.txt file.
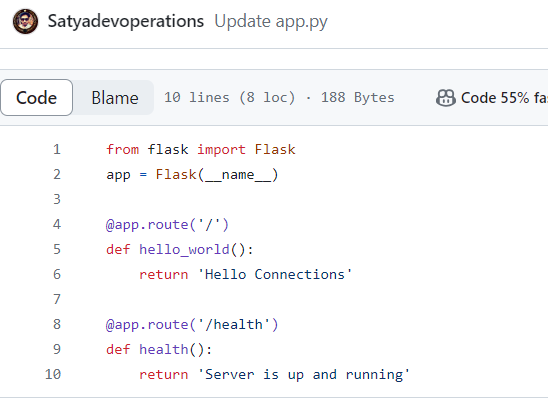
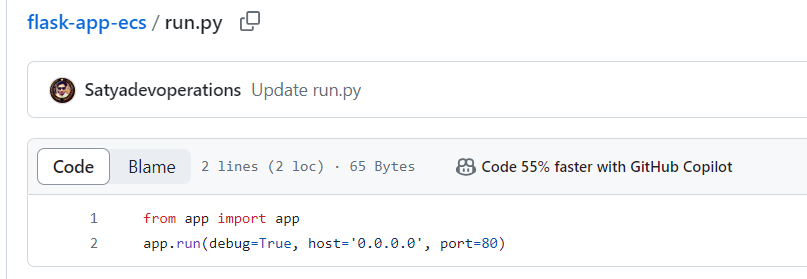
Here in app.py application related code is written and in run.py how to run the application details are mentioned.
Now le
Let's write the Dockerfile for the application.
#Get base image for running the python application(ask devloper for the version)
FROM python:3.9
#Updating the package
RUN apt-get update -y
# Create a Working directory to compile and run python app
WORKDIR /app
# Everything i am copying from source(local) to my working dir(my working dir and local
# both are in the same path
COPY . .
#install all the required dependencies
#(When i google about how to install the requirements.txt u can get the same cmd).
#It install all the requirements in a recursive mannerz
RUN pip install -r requirements.txt
CMD ["python","run.py"]
Now while building the code i got an error saying below
ubuntu@ip-172-31-0-208:~$ docker run -p 80:80 flask-app:latest
Traceback (most recent call last):
  File "/app/run.py", line 1, in <module>
    from app import app
  File "/app/app.py", line 1, in <module>
    from flask import Flask
  File "/usr/local/lib/python3.9/site-packages/flask/__init__.py", line 5, in <module>
    from .app import Flask as Flask
  File "/usr/local/lib/python3.9/site-packages/flask/app.py", line 30, in <module>
    from werkzeug.urls import url_quote
ImportError: cannot import name 'url_quote' from 'werkzeug.urls' (/usr/local/lib/python3.9/site-packages/werkzeug/urls.py)
ImportError: cannot import name 'url_quote' from 'werkzeug.urls' (/usr/local/lib/python3.9/site-packages/werkzeug/urls.py)
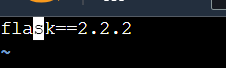
The error came because of flask version mismatch error. After consulting with the Developer i found there was a versioning mismatch issue. In the requirements.txt file it's version is 2.2.2 but in the Docker file we mentioned as latest.
After consultation with the developer and then building the code,

Then my
ubuntu@ip-172-31-0-208:~/docker-projects/flask-app-ecs
$ docker build . -t flask-app:latest
The logs output will be like as mentioned below
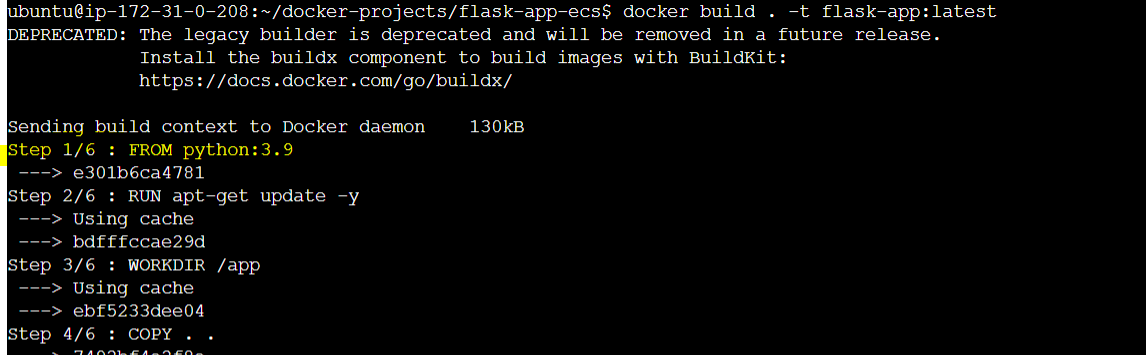
ubuntu@ip-172-31-0-208:~/docker-projects/flask-app-ecs
$ docker build . -t flask-app:latest
DEPRECATED: The legacy builder is deprecated and will be removed in a future release.
Install the buildx component to build images with BuildKit:
https://docs.docker.com/go/buildx/
Sending build context to Docker daemon 130kB
Step 1/6 : FROM python:3.9
---> e301b6ca4781
Step 2/6 : RUN apt-get update -y
---> Using cache
---> bdfffccae29d
Step 3/6 : WORKDIR /app
---> Using cache
---> ebf5233dee04
Step 4/6 : COPY . .
---> 7492bf4e2f8e
Step 5/6 : RUN pip install -r requirements.txt
---> Running in 7a8d5b3e71c5
Collecting flask
Downloading flask-3.0.2-py3-none-any.whl (101 kB)
━━━━━━━━━━━━━━━━━━━━━━━━━━━━━━━━━━━━━━ 101.3/101.3 kB 13.6 MB/s eta 0:00:00
Collecting click>=8.1.3
Downloading click-8.1.7-py3-none-any.whl (97 kB)
━━━━━━━━━━━━━━━━━━━━━━━━━━━━━━━━━━━━━━━━ 97.9/97.9 kB 16.7 MB/s eta 0:00:00
Collecting blinker>=1.6.2
Downloading blinker-1.7.0-py3-none-any.whl (13 kB)
Collecting Werkzeug>=3.0.0
Downloading werkzeug-3.0.1-py3-none-any.whl (226 kB)
━━━━━━━━━━━━━━━━━━━━━━━━━━━━━━━━━━━━━━ 226.7/226.7 kB 31.0 MB/s eta 0:00:00
Collecting Jinja2>=3.1.2
Downloading Jinja2-3.1.3-py3-none-any.whl (133 kB)
━━━━━━━━━━━━━━━━━━━━━━━━━━━━━━━━━━━━━━ 133.2/133.2 kB 22.1 MB/s eta 0:00:00
Collecting importlib-metadata>=3.6.0
Downloading importlib_metadata-7.0.1-py3-none-any.whl (23 kB)
Collecting itsdangerous>=2.1.2
Downloading itsdangerous-2.1.2-py3-none-any.whl (15 kB)
Collecting zipp>=0.5
Downloading zipp-3.17.0-py3-none-any.whl (7.4 kB)
Collecting MarkupSafe>=2.0
Downloading MarkupSafe-2.1.5-cp39-cp39-manylinux_2_17_x86_64.manylinux2014_x86_64.whl (25 kB)
Installing collected packages: zipp, MarkupSafe, itsdangerous, click, blinker, Werkzeug, Jinja2, importlib-metadata, flask
Successfully installed Jinja2-3.1.3 MarkupSafe-2.1.5 Werkzeug-3.0.1 blinker-1.7.0 click-8.1.7 flask-3.0.2 importlib-metadata-7.0.1 itsdangerous-2.1.2 zipp-3.17.0
WARNING: Running pip as the 'root' user can result in broken permissions and conflicting behaviour with the system package manager. It is recommended to use a virtual environment instead: https://pip.pypa.io/warnings/venv
[notice] A new release of pip is available: 23.0.1 -> 24.0
[notice] To update, run: pip install --upgrade pip
Removing intermediate container 7a8d5b3e71c5
---> c4dff2a633a2
Step 6/6 : CMD ["python","run.py"]
---> Running in 6ac91e458913
Removing intermediate container 6ac91e458913
---> a9e9341cd83c
Successfully built a9e9341cd83c
Successfully tagged flask-app:latest
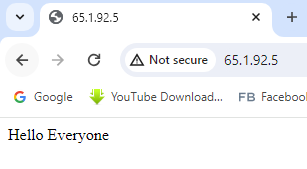
ubuntu@ip-172-31-0-208:~/docker-projects/flask-app-ecs$ docker run -p 80:80 flask-app:latest
* Serving Flask app 'app'
* Debug mode: on
WARNING: This is a development server. Do not use it in a production deployment. Use a production WSGI server instead.
* Running on all addresses (0.0.0.0)
* Running on http://127.0.0.1:80
* Running on http://172.17.0.2:80
Press CTRL+C to quit
* Restarting with stat
* Debugger is active!
* Debugger PIN: 953-325-303
49.37.117.122 - - [29/Feb/2024 18:15:49] "GET / HTTP/1.1" 200 -
49.37.117.122 - - [29/Feb/2024 18:15:49] "GET /favicon.ico HTTP/1.1" 404 -
49.37.117.122 - - [29/Feb/2024 18:15:53] "GET / HTTP/1.1" 200 -
198.235.24.9 - - [29/Feb/2024 18:16:40] code 400, message Bad request version ('À\x13À')
198.235.24.9 - - [29/Feb/2024 18:16:40] "\x16\x03\x01\x00î\x01\x00\x00ê\x03\x03\x95.±d¨Ì<L}£å\x143QVE°ÙTl«Ñfö\x90Æ«\x85\x19¡¬³ ýS\x1b\x9f\x1cas\x1d\x00\x82\x0bióÁs7¢ª\x8d_¤óuǬÛÃQ{X$\x00&À+À/À,À0̨̩À\x09À\x13À" HTTPStatus.BAD_REQUEST -
198.235.24.9 - - [29/Feb/2024 18:16:41] code 400, message Bad request version ('À(À$À\x14À')
198.235.24.9 - - [29/Feb/2024 18:16:41] "\x16\x03\x01\x00Ê\x01\x00\x00Æ\x03\x03\x0bÏ?9¶\x98¢\x87\x95ñ±k\x88®\x8aÛ¡§Â\x9fË$¹ì28\x15¢µ\x8f\x85[\x00\x00hÌ\x14Ì\x13À/À+À0À,À\x11À\x07À'À#À\x13À\x09À(À$À\x14À" HTTPStatus.BAD_REQUEST -
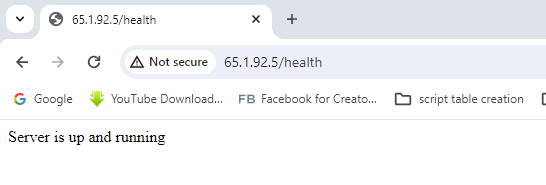
49.37.117.122 - - [29/Feb/2024 18:17:05] "GET /health HTTP/1.1" 200 -
49.37.117.122 - - [29/Feb/2024 18:18:50] "GET /health HTTP/1.1" 200 -
49.37.117.122 - - [29/Feb/2024 18:18:51] "GET /health HTTP/1.1" 200 -
49.37.117.122 - - [29/Feb/2024 18:18:51] "GET /health HTTP/1.1" 200 -
49.37.117.122 - - [29/Feb/2024 18:18:52] "GET /health HTTP/1.1" 200 -
49.37.117.122 - - [29/Feb/2024 18:18:52] "GET /health HTTP/1.1" 200 -
49.37.117.122 - - [29/Feb/2024 18:18:52] "GET /health HTTP/1.1" 200 -
49.37.117.122 - - [29/Feb/2024 18:18:52] "GET /health HTTP/1.1" 200 -
49.37.117.122 - - [29/Feb/2024 18:18:53] "GET /health HTTP/1.1" 200 -
49.37.117.122 - - [29/Feb/2024 18:18:53] "GET /health HTTP/1.1" 200 -
49.37.117.122 - - [29/Feb/2024 18:18:54] "GET /health HTTP/1.1" 200 -
49.37.117.122 - - [29/Feb/2024 18:19:02] "GET / HTTP/1.1" 200 -
49.37.117.122 - - [29/Feb/2024 18:19:08] "GET / HTTP/1.1" 200 -
49.37.117.122 - - [29/Feb/2024 18:19:08] "GET / HTTP/1.1" 200 -
49.37.117.122 - - [29/Feb/2024 18:19:09] "GET / HTTP/1.1" 200 -
49.37.117.122 - - [29/Feb/2024 18:19:09] "GET / HTTP/1.1" 200 -
49.37.117.122 - - [29/Feb/2024 18:19:09] "GET / HTTP/1.1" 200 -
49.37.117.122 - - [29/Feb/2024 18:19:09] "GET / HTTP/1.1" 200 -
49.37.117.122 - - [29/Feb/2024 18:19:09] "GET / HTTP/1.1" 200 -
49.37.117.122 - - [29/Feb/2024 18:19:09] "GET / HTTP/1.1" 200 -
49.37.117.122 - - [29/Feb/2024 18:19:17] "GET /health HTTP/1.1" 200 -
49.37.117.122 - - [29/Feb/2024 18:19:21] "GET /health HTTP/1.1" 200 -
49.37.117.122 - - [29/Feb/2024 18:19:21] "GET /health HTTP/1.1" 200 -
Output message:--
#Suppose i do docker exec i will be landing in my working directory
#Here i will get my python related code and application and dependencies
ubuntu@ip-172-31-0-208:~$ docker exec -it 9417b97558f2 /bin/bash
root@9417b97558f2:/app# ls
Dockerfile  README.md  __pycache__  app.py  flask-app-ecs  requirements.txt  run.py
root@9417b97558f2:/app#
root@9417b97558f2:/app#
root@9417b97558f2:/app# cd ..
===========================================================================
#Here i will get my Operating system related details
root@9417b97558f2:/# ls
app  bin  boot  dev  etc  home  lib  lib64  media  mnt  opt  proc  root  run  sbin  srv  sys  tmp  usr  var
root@9417b97558f2:/#
Create Docker file for Node JS Application & Deployment:--
First i am cloning the repository and the application code and dependencies
ubuntu@ip-172-31-0-208:~/docker-projects/node-app/node-todo-cicd$ ls -l
total 260
drwxrwxr-x 2 ubuntu ubuntu 4096 Mar 3 14:52 DevSecOps
-rw-rw-r-- 1 ubuntu ubuntu 112 Mar 3 14:52 Dockerfile
-rw-rw-r-- 1 ubuntu ubuntu 1161 Mar 3 14:52 Jenkinsfile
-rw-rw-r-- 1 ubuntu ubuntu 159 Mar 3 14:52 README.md
-rw-rw-r-- 1 ubuntu ubuntu 2614 Mar 3 14:52 app.js
-rw-rw-r-- 1 ubuntu ubuntu 119 Mar 3 14:52 docker-compose.yaml
-rw-rw-r-- 1 ubuntu ubuntu 220311 Mar 3 14:52 package-lock.json
-rw-rw-r-- 1 ubuntu ubuntu 530 Mar 3 14:52 package.json
-rw-rw-r-- 1 ubuntu ubuntu 395 Mar 3 14:52 sonar-project.properties
drwxrwxr-x 2 ubuntu ubuntu 4096 Mar 3 14:52 terraform
-rw-rw-r-- 1 ubuntu ubuntu 888 Mar 3 14:52 test.js
drwxrwxr-x 2 ubuntu ubuntu 4096 Mar 3 14:52 views
ubuntu@ip-172-31-0-208:~/docker-projects/node-app
/node-todo-cicd$ cat README.md
# node-todo-cicd
Run these commands:
`sudo apt install nodejs`
`sudo apt install npm`
#For the above two cmds we have written FROM node:14 in docker file
`npm install`
`node app.js`
or Run by docker compose
test
#README.md contains all the commands require to create a docker file and
#and run the node.js app
#application. The base image required to run the node.js application is
#node.js
FROM node:14
WORKDIR /app
#It will copy all the test case and dendencies present in the current
#directory
COPY . .
#It will install all the requirements and dependencies with the help of
#node package manager tool
RUN npm install
RUN npm run test
#It will make sure all my test cases are passing.
EXPOSE 8000
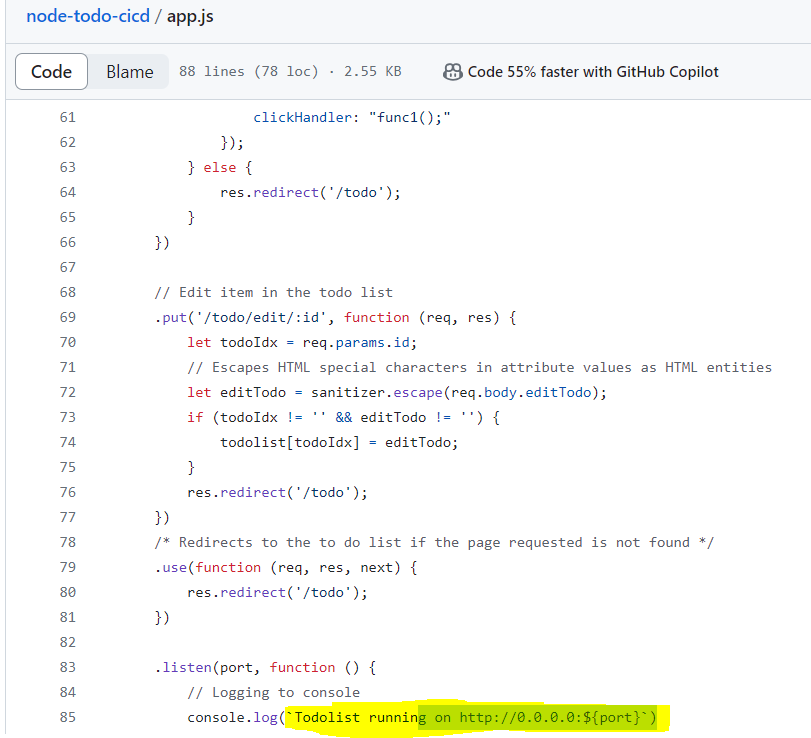
#We will check the app.js code and could see 8000 port we need to expose
CMD ["node","app.js"]
# It will execute the app.js file
Let's Write the Docker file. We can't explicitly specify the base image of the node.js application because the libraries and the code written in the app.js file might not be compatible in the future node.js application. Some times in the organization where we have written some code in a updated new module and because of that the code in the older module crashed. To avoid this scenario we need to check the file package.json and requirements.txt specifies where dependencies were clearly specified. Or we can check with the developer to get the details. Or you can prompt chatgpt as "based on this package.json which node version is the most suitable" and provide your package.json file.

It shows version 14 and 16 will work.
ubuntu@ip-172-31-0-208:~/docker-projects/node-app/
node-todo-cicd$ cat package.json
{
  "name": "my-todolist",
  "version": "0.1.0",
  "dependencies": {
    "body-parser": "^1.16.0",
    "ejs": "^2.5.5",
    "express": "^4.14.0",
    "method-override": "^3.0.0",
    "sanitizer": "^0.1.3"
  },
  "scripts": {
    "start": "node app.js",
    "test": "mocha --recursive --exit",
    "sonar": "sonar-scanner"
  },
  "author": "riaan@entersekt.com",
  "description": "Basic to do list exercise",
  "devDependencies": {
    "chai": "^4.2.0",
    "mocha": "^6.2.1",
    "nyc": "^14.1.1",
    "supertest": "^4.0.2"
  }
}
==================================
#We are taking node 14th version as the base image
After doing the build In the below output section i could see all my test cases has been passed successfully and build has been done Successfully.
ubuntu@ip-172-31-0-208:~/docker-projects/node-app/node-todo-cicd$ docker build -t node-app:latest .
DEPRECATED: The legacy builder is deprecated and will be removed in a future release.
            Install the buildx component to build images with BuildKit:
            https://docs.docker.com/go/buildx/

Sending build context to Docker daemon  466.4kB
Step 1/5 : FROM node:14
14: Pulling from library/node
2ff1d7c41c74: Pull complete
b253aeafeaa7: Pull complete
3d2201bd995c: Pull complete
1de76e268b10: Pull complete
d9a8df589451: Pull complete
6f51ee005dea: Pull complete
5f32ed3c3f27: Pull complete
0c8cc2f24a4d: Pull complete
0d27a8e86132: Pull complete
Digest: sha256:a158d3b9b4e3fa813fa6c8c590b8f0a860e015ad4e59bbce5744d2f6fd8461aa
Status: Downloaded newer image for node:14
 ---> 1d12470fa662
Step 2/5 : WORKDIR /app
 ---> Running in 018ca85357e3
Removing intermediate container 018ca85357e3
 ---> 97bb310a3828
Step 3/5 : COPY . .
 ---> cff87fb30528
Step 4/5 : RUN npm install
 ---> Running in e2cb631ec20d
npm WARN read-shrinkwrap This version of npm is compatible with lockfileVersion@1, but package-lock.json was generated for lockfileVersion@2. I'll try to do my best with it!

> ejs@2.7.4 postinstall /app/node_modules/ejs
> node ./postinstall.js

Thank you for installing EJS: built with the Jake JavaScript build tool (https://jakejs.com/)

npm WARN my-todolist@0.1.0 No repository field.
npm WARN my-todolist@0.1.0 No license field.

added 291 packages from 653 contributors and audited 291 packages in 9.169s

44 packages are looking for funding
  run `npm fund` for details

found 15 vulnerabilities (6 moderate, 6 high, 3 critical)
  run `npm audit fix` to fix them, or `npm audit` for details
Removing intermediate container e2cb631ec20d
 ---> 3827d3448939
Step 5/5 : RUN npm run test
 ---> Running in fad130b02b0b

> my-todolist@0.1.0 test /app
> mocha --recursive --exit
  Simple Calculations
This part executes once before all tests
    Test1
executes before every test
      ✓ Is returning 5 when adding 2 + 3
executes before every test
      ✓ Is returning 6 when multiplying 2 * 3
    Test2
executes before every test
      ✓ Is returning 4 when adding 2 + 3
executes before every test
      ✓ Is returning 8 when multiplying 2 * 4
This part executes once after all tests

  4 passing (13ms)

Removing intermediate container fad130b02b0b
 ---> b1a6a7f5ed4f
Successfully built b1a6a7f5ed4f
Successfully tagged node-app:latest
After deploy the application:--
Multi-Stage Docker Build:--
A multistage build allows you to use multiple images to build a final product. In a multistage build, you have a single Dockerfile, but can define multiple images inside it to help build the final image.
They allow you to run build steps in parallel, making your build pipeline faster and more efficient.
They allow you to create a final image with a smaller footprint, containing only what's needed to run your program.
What is a Distroless Docker image ?
It is a very minimalistic image(lightweight) docker image that has only a runtime environment it doesn't have basic packages like find, ls, wget, curl hence it provide the highest level of security. The languages and applications like golang has highest level of security because it doesn't have any runtime.
Let's practically check and see how by using Docker Multistage build i can reduce the docker file size significantly.
First i cloned the folder Where i have contents like

Dockerfile README.md calculator.go dockerfile-without-multistage
Now lets see the contents of the Dockerfile
e-without-multistage$ cat Dockerfile
###########################################
# BASE IMAGE
###########################################

FROM ubuntu AS build
##I have installed ubuntu and give an alias name build updated the package
## And installed the go language
RUN apt-get update && apt-get install -y golang-go

ENV GO111MODULE=off
#Copied the source code
COPY . .
#I am running the go build after building the binary
RUN CGO_ENABLED=0 go build -o /app .
#I am executing the binary as a part of entry point.
ENTRYPOINT ["/app"]
Now after we build it lets see the image size
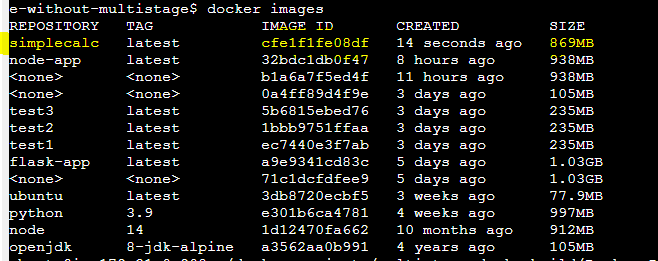
Suppose i want to reduce the size of the image then in that case we have to use docker multistage build to create the docker file.
###########################################
# BASE IMAGE STAGE 1
###########################################
# stage 1 we will have the build steps i dont have entrypoint or the cmd.
# I have the updated the package and installed the go language
FROM ubuntu AS build

RUN apt-get update && apt-get install -y golang-go
#
ENV GO111MODULE=off

COPY . .

RUN CGO_ENABLED=0 go build -o /app .

############################################
# HERE STARTS THE MAGIC OF MULTI STAGE BUILD
############################################
#scratch is the minimalistic distrolic image.
FROM scratch

# Copying the compiled binary from the build stage
COPY --from=build /app /app

# Set the entrypoint for the container to run the binary
ENTRYPOINT ["/app"]
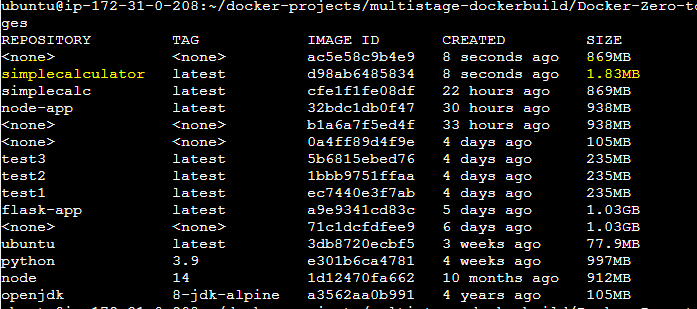
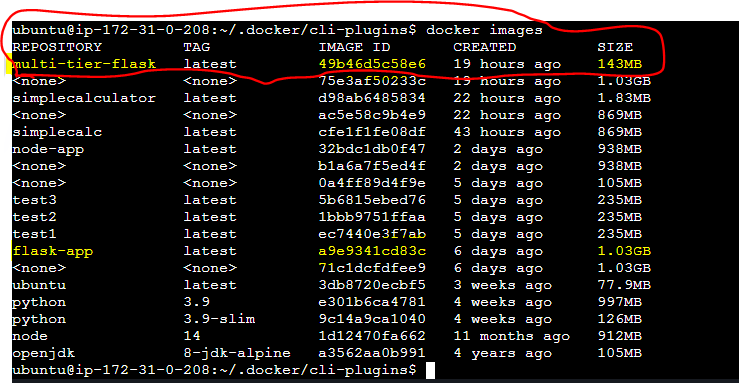
Now let's see the size after performing the docker build. We can size has been reduced significantly. This image is very less vulnerable to outside hackers. Because it has bare minimum binaries to run the application.
There is one github folder where we have the details of the distroless images
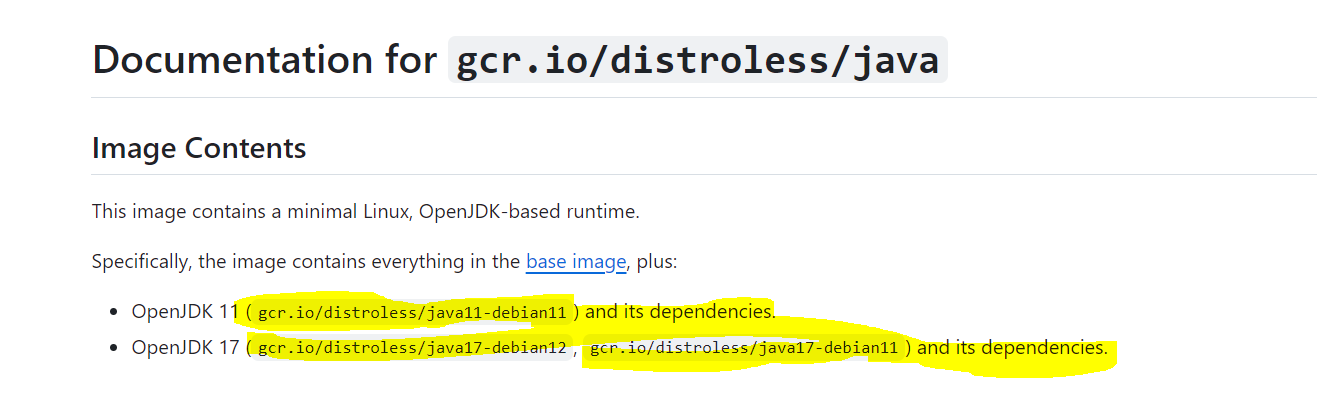
In the above highlighted screenshot we have details of distroless images for OpenJDK 11 and OpenJDK 17 respectively.
############################################
# HERE STARTS THE MAGIC OF MULTI STAGE BUILD
############################################
#scratch is the minimalistic distrolic image.
#replace scratch with gcr.io/distroless/java11-debian11 if usuing openjdk11
FROM scratch

# Copying the compiled binary from the build stage
COPY --from=build /app /app

# Set the entrypoint for the container to run the binary
ENTRYPOINT ["/app"]
Let's write an Multistage docker file for a python application:--
Here below is my docker file which i have written for the
ubuntu@ip-172-31-0-208:~/docker-projects/flask-app-ecs$ cat Dockerfile
FROM python:3.9 AS backend-builder
# Updating the packages
RUN apt-get update -y
# Your working directory
WORKDIR /app
# Copy the source code to the working directory in container
COPY . .
# install all the required dependencies with backend builder base
RUN pip install -r requirements.txt
# Run the python app
 CMD ["python","run.py"]

#---------STAGE 2 -----------
FROM python:3.9-slim
##With this slim version base image i can install my requirements.txt
WORKDIR /app

COPY --from=backend-builder /usr/local/lib/python3.9/site-packages/ /user/local/lib/python3.9/site-packages/
#Site packages are the page where all the compiled required packages
#are available in /usr/local/lib/ place. Here in this place my python
#libraries are stored.
COPY --from=backend-builder /app /app
#I have copied the code present in the backend builder(alias).
# Run the python app
 CMD ["python","run.py"]
Here we have in two stages which is stage 1 and stage 2 respectively.
Stage 1:-- Here we have taken python:3.9 base image where all the application dependencies, necessary packages for running the application is installed. where the base image size is very large which is around more than a 1 G.B . I have given an alias for the image as backend-builder. Backend-builder is an layer where 900 M.B image size is there,
Stage2:-- In this stage We are importing a slim base image and importing the work from the stage 1(compiling the details and dependency from stage 1(backend builder and compressing to stage 2). Now after building the image i could see the size of the image has been reduced significantly.
Docker Scout:--
Docker Scout is a solution for proactively enhancing your software supply chain security. By analyzing your images(check the vulnerabilities, risk which might be there in the image) Docker Scout compiles an inventory of components, also known as a Software Bill of Materials (SBOM).
To install docker scout follow the link . Under Script installation
curl -sSfL https://raw.githubusercontent.com/docker/scout-cli/main/install.sh | sh -s --
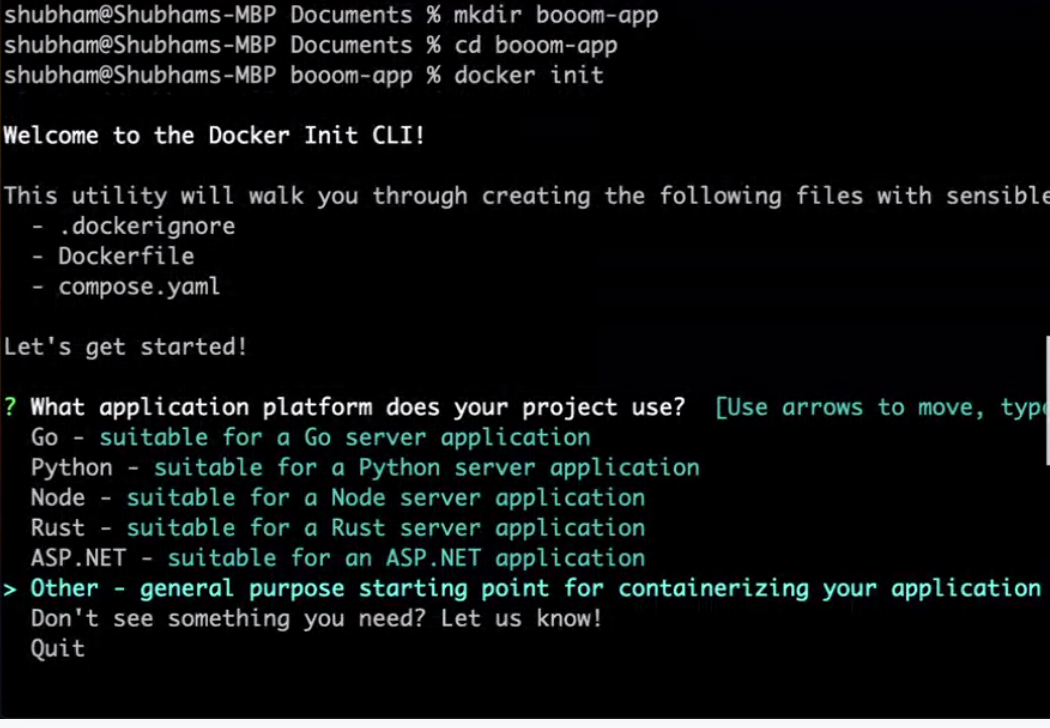
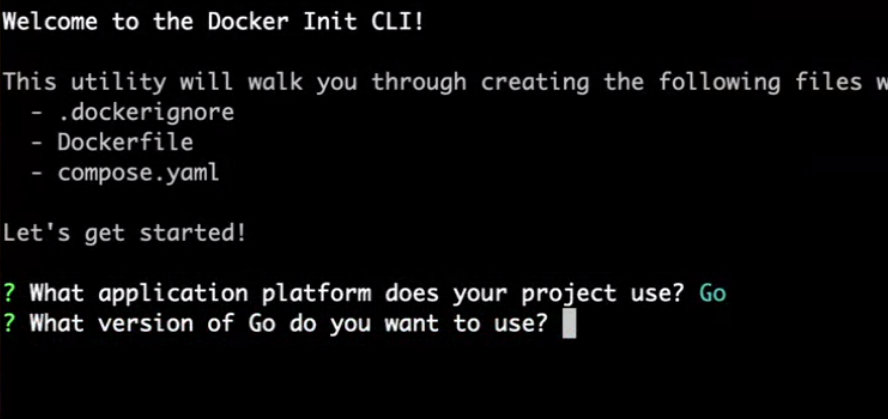
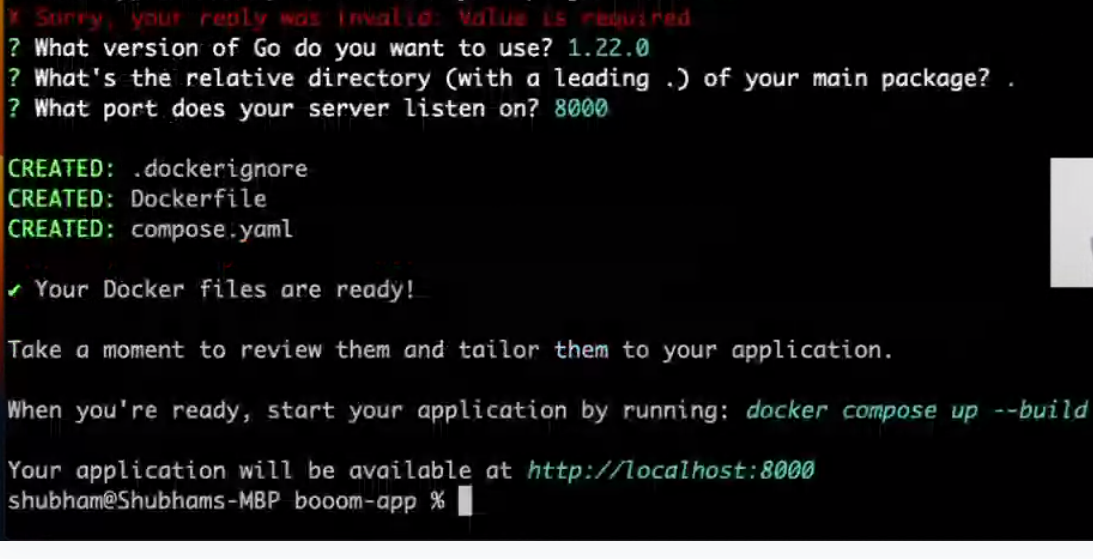
Dockerinit :--
Docker Desktop provides the docker init CLI command. Run docker init in your project directory to be walked through the creation of the following files with sensible defaults for your project:
.dockerignore
Dockerfile
compose.yaml
If any of the files already exist, a prompt appears and provides a warning as well as giving you the option to overwrite all the files. If docker-compose.yaml already exists instead of compose.yaml, docker init can overwrite it, using docker-compose.yaml as the name for the Compose file.
In my Docker Desktop I have created a folder named boom-app and prompt user to create the below details. Suppose i want to create Dockerfile and compose.yaml for golang application with the help of dockerinit below are the steps:--